
|
Available Languages
|

|

|
*Σύντομα και στα Ελληνικά
Introduction
To drive a DC motor you need a larger amount of current than Arduino board can give. For that reason you must use a transistor. Transistors have limits and maximum specs, just be sure those values are enough for your use.
The transistor we are using for this tutorial is P2N2222A and is rated at 40V and 200mA, it just perfect for one toy dc motor.
Note: If your motor needs more current than 200mA you can just buy another transistor (ask the staff in the electronics store). The connections below are the same.
In this tutorial we will spin a dc motor from one direction, with different speed. You will be able to control motor speed from serial monitor!
What you will need - Hardware
|
For this tutorial you will need:
|
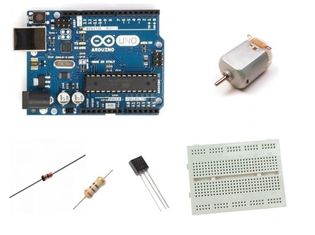
|
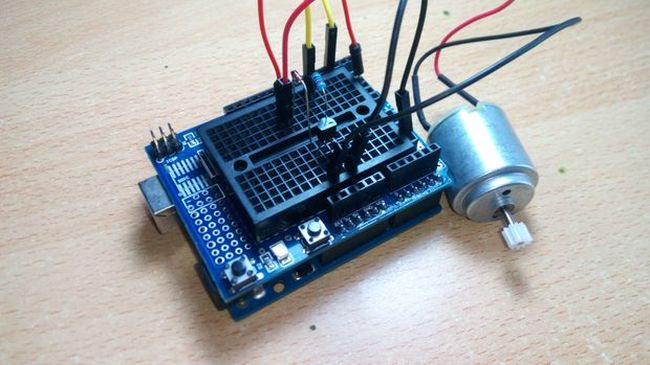
The Circuit
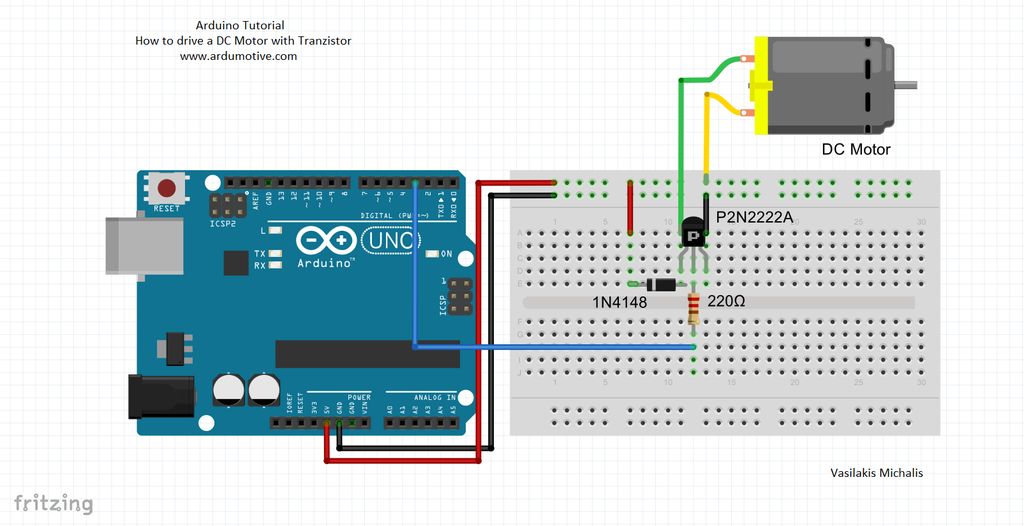
The connections are easy, see the image above with the breadboard circuit schematic.
Diode in circuit:
It is possible, when motor is spinning, suddenly turn off because the magnetic field inside it collapses, generating a voltage spike. This can damage the transistor, to prevent this, we use a diode which diverts the voltage spike around the transistor.
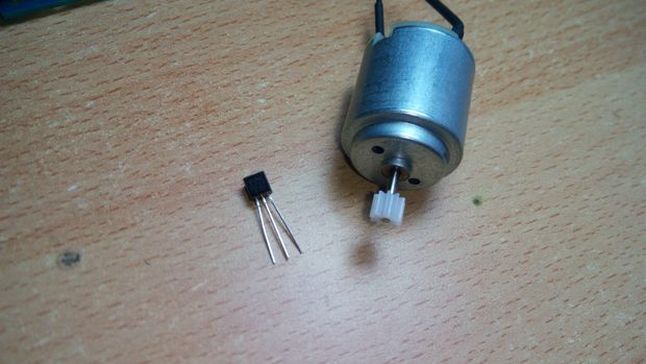
Transistor Pinout:
PNP type - front side view
Diode in circuit:
It is possible, when motor is spinning, suddenly turn off because the magnetic field inside it collapses, generating a voltage spike. This can damage the transistor, to prevent this, we use a diode which diverts the voltage spike around the transistor.
Transistor Pinout:
PNP type - front side view
- Collector
- Base
- Emitter
The code
1 2 3 4 5 6 7 8 9 10 11 12 13 14 15 16 17 18 19 20 21 22 23 24 25 26 27 28 29 30 31 32 33 34 35 36 37 38 39 40 41 42 43 44 45 | /* Control Speed of a DC Motor from serial monitor More info: http://www.ardumotive.com/how-to-drive-a-dc-motor-with-transistor.html Dev: Vasilakis Michalis // Date: 13/7/2015 // www.ardumotive.com */ //Transistor 'Base' pin or input pin of motor driver ic to Arduino PWM Digital Pin 3 const int motorPin = 3; int Speed; //Variable to store Speed, by defaul 0 PWM int flag; void setup() { pinMode(motorPin, OUTPUT); //Set pin 3 as an OUTPUT Serial.begin(9600); //Init serial communication //Print a message: Serial.println("Give a number from 50 to 255."); //Why minimun value 50? Because with values below 50 the motor doesn't spin ;) Serial.println(""); //Blank line } void loop() { //Check if incoming data is available: if (Serial.available() > 0) { // If it is, we'll use parseInt() to pull out only numbers: Speed = Serial.parseInt(); flag=0; } //Valid range is from 50 to 255 if (Speed>=50 && Speed<=255){ //Send PWM value with analogWrite to Arduino pin 3 and print a message to serial monitor analogWrite(motorPin, Speed); //Print message only once if (flag==0){ //Print PWM value Serial.print("Motor spinning with "); Serial.print(Speed); Serial.println(" PWM"); flag=1; } } delay(1000); } // |
|
Download the code from here and open it with Arduino IDE.
|
| ||
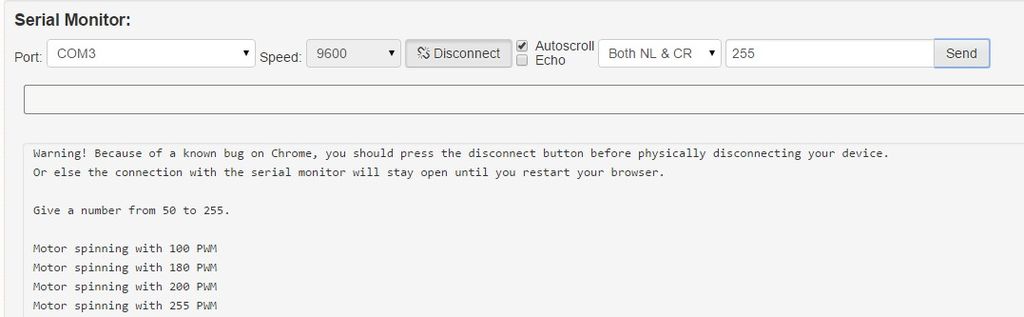
Open the serial monitor from tools menu of Arduino IDE and try to send a number from 50 to 255.
Well done!
You have successfully completed one more Arduino "How to" tutorial and you learned how to drive a DC Motor with Transistor. I hope you liked this, let me know in the comments.


