Introduction
What you will need - HardwareFor this tutorial you will need: |
|
The Circuit
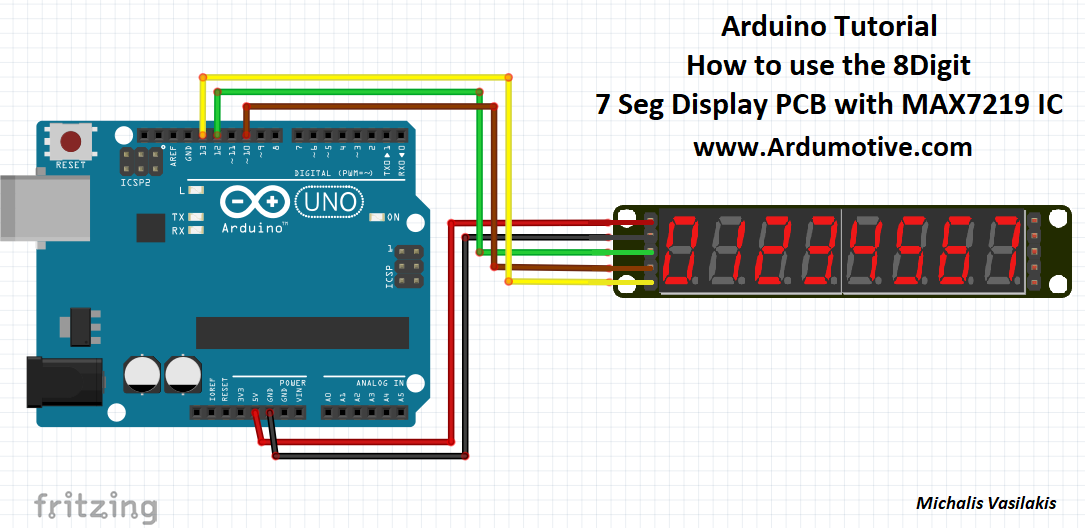
The connections are easy, see the image above with breadboard circuit schematic.
- Vcc to Arduino 5V Pin
- GND to Arduino GND
- SDI to Arduino pin
- CLK to Arduino pin
- LOAD to Arduino pin
The code
1 2 3 4 5 6 7 8 9 10 11 12 13 14 15 16 17 18 19 20 21 22 23 24 25 26 27 28 29 30 31 32 33 34 35 36 37 38 39 40 41 42 43 44 45 46 47 48 49 50 51 52 53 54 55 56 57 58 59 60 61 62 63 64 65 66 67 68 69 70 71 72 73 | //We always have to include the library #include "LedControl.h" /* Now we need a LedControl to work with. ***** These pin numbers will probably not work with your hardware ***** pin 12 is connected to the DataIn pin 13 is connected to the CLK pin 10 is connected to LOAD We have only a single MAX72XX. */ LedControl lc=LedControl(12,13,10,1); /* we always wait a bit between updates of the display */ unsigned long delaytime=250; void setup() { /* The MAX72XX is in power-saving mode on startup, we have to do a wakeup call */ lc.shutdown(0,false); /* Set the brightness to a medium values */ lc.setIntensity(0,8); /* and clear the display */ lc.clearDisplay(0); } /* This method will display the characters for the word "Arduino" one after the other on digit 0. */ void writeArduinoOn7Segment() { lc.setChar(0,0,'a',false); delay(delaytime); lc.setRow(0,0,0x05); delay(delaytime); lc.setChar(0,0,'d',false); delay(delaytime); lc.setRow(0,0,0x1c); delay(delaytime); lc.setRow(0,0,B00010000); delay(delaytime); lc.setRow(0,0,0x15); delay(delaytime); lc.setRow(0,0,0x1D); delay(delaytime); lc.clearDisplay(0); delay(delaytime); } /* This method will scroll all the hexa-decimal numbers and letters on the display. You will need at least four 7-Segment digits. otherwise it won't really look that good. */ void scrollDigits() { for(int i=0;i<13;i++) { lc.setDigit(0,3,i,false); lc.setDigit(0,2,i+1,false); lc.setDigit(0,1,i+2,false); lc.setDigit(0,0,i+3,false); delay(delaytime); } lc.clearDisplay(0); delay(delaytime); } void loop() { writeArduinoOn7Segment(); scrollDigits(); } |
|
Download the code from here and open it with Arduino IDE.
|
| ||||||
Well done!
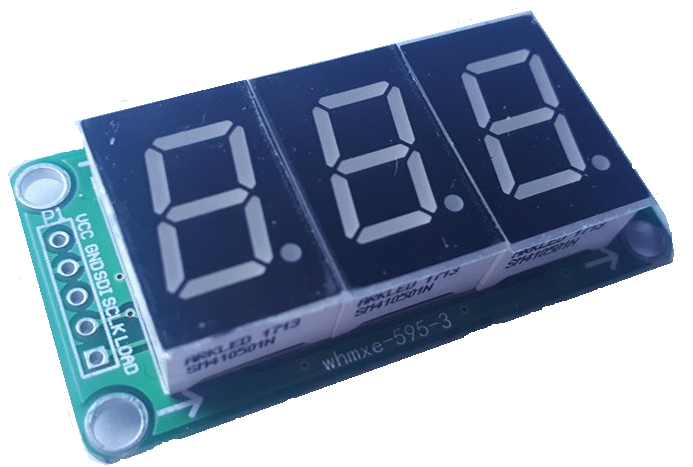
You have successfully completed one more Arduino "How to" tutorial and you learned how to use the 3-Digit Seven Segment Display.
I hope you liked this, let me know in the comments.
I hope you liked this, let me know in the comments.


