
|
Available Languages
|

|

|
Εισαγωγή
|
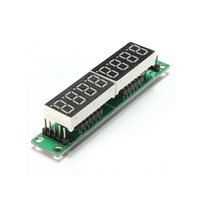
Σε αυτόν τον οδηγό θα δούμε πως μπορούμε να συνδέσουμε το 8-Digit seven segment display with MAX-7219 IC module με το Arduino UNO.
|
Τα υλικά που θα χρειαστούμε |
|
Το κύκλωμα
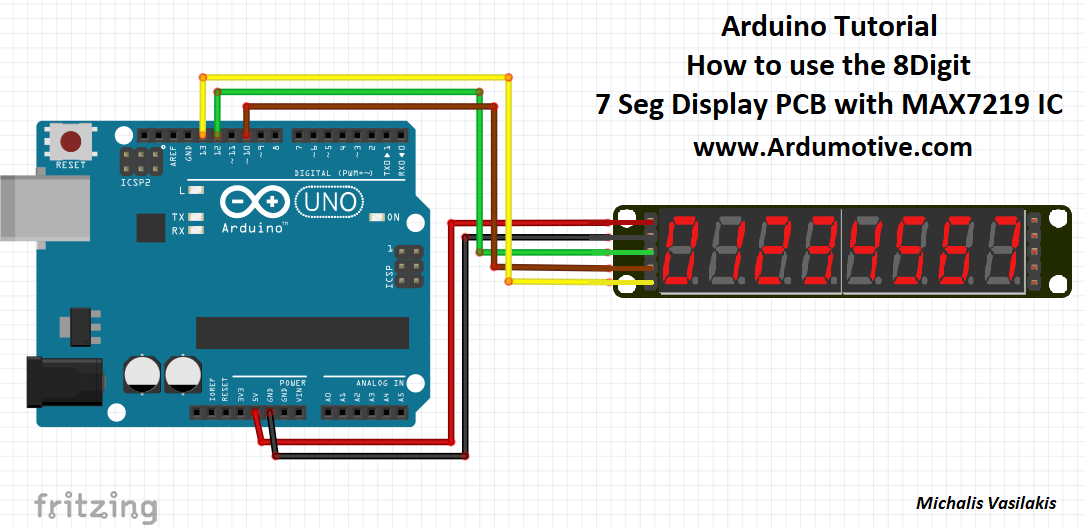
Η συνδεσμολογία είναι εύκολη, δείτε την παραπάνω εικόνα με το σχηματικό του κυκλώματος σε breadboard.
- Vcc στο Pin 5V του Arduino
- GND στο GND του Arduino
- DIN στο Pin 12 του Arduino
- CS στο Pin 10 του Arduino
- CLK στο Pin 13 του Arduino
Ο κώδικας
1 2 3 4 5 6 7 8 9 10 11 12 13 14 15 16 17 18 19 20 21 22 23 24 25 26 27 28 29 30 31 32 33 34 35 36 37 38 39 40 41 42 43 44 45 46 47 48 49 50 51 52 53 54 55 56 57 58 59 60 61 62 63 64 65 66 67 68 69 70 71 72 73 | //We always have to include the library #include "LedControl.h" /* Now we need a LedControl to work with. ***** These pin numbers will probably not work with your hardware ***** pin 12 is connected to the DataIn pin 13 is connected to the CLK pin 10 is connected to LOAD We have only a single MAX72XX. */ LedControl lc=LedControl(12,13,10,1); /* we always wait a bit between updates of the display */ unsigned long delaytime=250; void setup() { /* The MAX72XX is in power-saving mode on startup, we have to do a wakeup call */ lc.shutdown(0,false); /* Set the brightness to a medium values */ lc.setIntensity(0,8); /* and clear the display */ lc.clearDisplay(0); } /* This method will display the characters for the word "Arduino" one after the other on digit 0. */ void writeArduinoOn7Segment() { lc.setChar(0,0,'a',false); delay(delaytime); lc.setRow(0,0,0x05); delay(delaytime); lc.setChar(0,0,'d',false); delay(delaytime); lc.setRow(0,0,0x1c); delay(delaytime); lc.setRow(0,0,B00010000); delay(delaytime); lc.setRow(0,0,0x15); delay(delaytime); lc.setRow(0,0,0x1D); delay(delaytime); lc.clearDisplay(0); delay(delaytime); } /* This method will scroll all the hexa-decimal numbers and letters on the display. You will need at least four 7-Segment digits. otherwise it won't really look that good. */ void scrollDigits() { for(int i=0;i<13;i++) { lc.setDigit(0,3,i,false); lc.setDigit(0,2,i+1,false); lc.setDigit(0,1,i+2,false); lc.setDigit(0,0,i+3,false); delay(delaytime); } lc.clearDisplay(0); delay(delaytime); } void loop() { writeArduinoOn7Segment(); scrollDigits(); } |
|
Κατεβάστε τον κώδικα απ' εδώ και ανοίξτε το αρχείο με το Arduino IDE. Μέσα θα βρείτε και την απαραίτητη βιβλιοθήκη,
|
| ||
Συγχαρητήρια!
Μόλις ολοκληρώσατε άλλο ένα "How to" tutorial και μάθατε πως να χρησιμοποιείτε το 8-Digit Seven Segment Display με το τσιπάκι MAX7219.
Ελπίζω να σας άρεσε, αν θέλετε μπορείτε να αφήσετε το σχόλιο σας παρακάτω.
Ελπίζω να σας άρεσε, αν θέλετε μπορείτε να αφήσετε το σχόλιο σας παρακάτω.


