
|
Available Languages
|

|

|
Introduction |
Published date: 19/05/2016
|

In this guide I will show you how to make your own Arduino two digit countdown timer. I made my own circuit by using the ATmega328 micro controller but this is an optional step. In this guide I will help you to make it easily on breadboard by using the Arduino uno board!
We will be able to set the timer by pressing the setup buttons. We will use two digits seven segment display, so the maximum countdown time will be 99 seconds.
Operation video:
We will be able to set the timer by pressing the setup buttons. We will use two digits seven segment display, so the maximum countdown time will be 99 seconds.
Operation video:
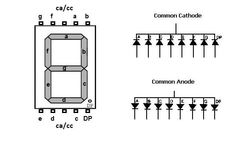
Find here an Arduino tutorial for the 7 segment display
So, let's get started!
So, let's get started!

|

|
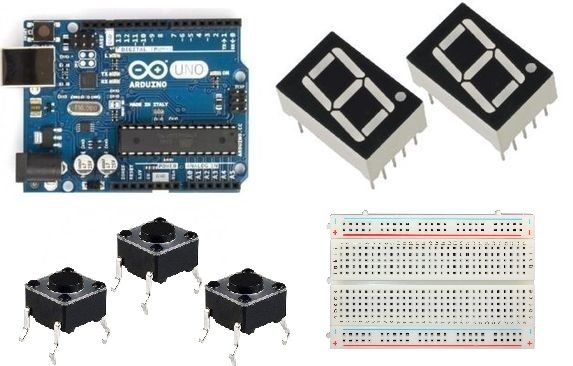
What you will need - Hardware
|
For this project we will need:
(*you can use common cathode or common anode type) |
|
The Circuit
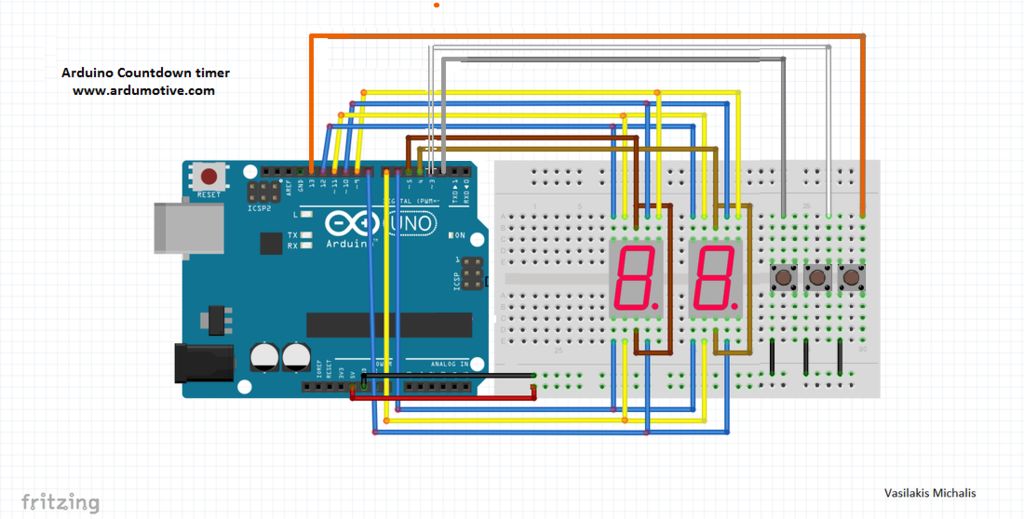
The connections are pretty easy, see the above image with the breadboard circuit schematic.
|
(if you want you can connect one 220 Ohm resistor to each pin - except "CC" or "CA")
|
|
Notes:
- The segments A-G: A, B, C, D, E, F, G -->10,9,8,7,6,11,12
- CC or CA pins of them connected to Arduino pin 4 & 5
- Start/stop button pin 2
- Change button pin 3
- Set button pin13
- dot pin of right digit at pin A0
- dot pin of left digit at pin A1
The Code
Here's the code, embedded using Codebender!
|
|
Try downloading the Codebender plugin and clicking on the "Run on Arduino" button to program your Arduino board with this sketch. And that's it, you've programmed your Arduino board directly from your browser! It's really amazing.
|
- SevenSeg disp (10,9,8,7,6,11,12); //Defines the segments A-G: SevenSeg(A, B, C, D, E, F, G);
- numOfDigits = 2 We have two digits 7 segment
- display.digitPins [numOfDigits] = {4,5} CC or CA pins of them connected to Arduino pin 4 and 5.
- disp.setDutyCycle(60) Control brightness of the display - "60" is 60% of led
Note: If you will not use the Codebender IDE for programming your Arduino board you will need to manual install the SevenSeg library in your Arduino IDE. Where to find it? Search the web, don't ask me... Or just use the easy and simple way of Codebender.
Well done!
That's it! You have successfully completed this guide and now you have your own Arduino countdown timer. If you want to restart the timer, just press the reset button.
I hope you liked this, let me know in the comments!
I hope you liked this, let me know in the comments!


