20/7/2018
Introduction
What you will need - Hardware
|
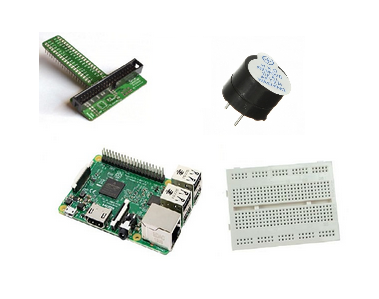
For this tutorial you will need:
|
The Circuit
|
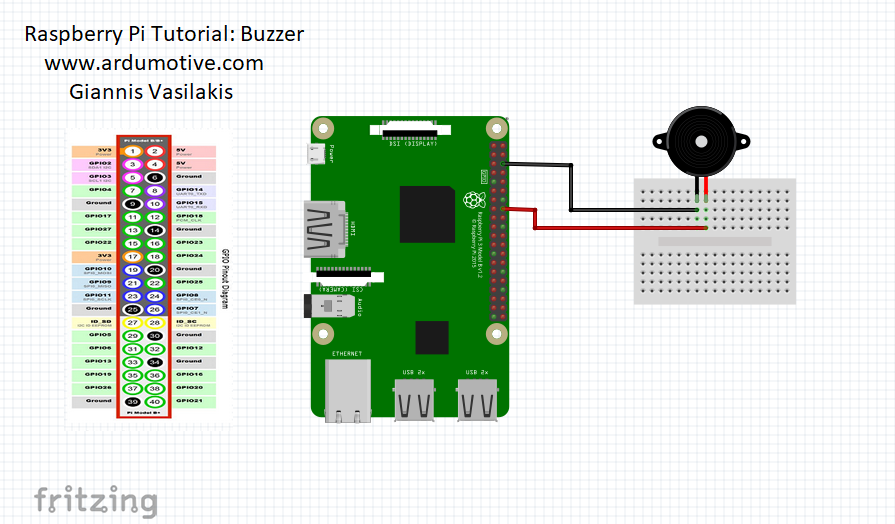
The connections are pretty easy, see the image above with breadboard circuit schematic.
|
|
Python code
In the program below, the first thing you do is to import the library for GPIO and sleep. The next step is to initialize pin 23 as an output pin with GPIO.setup( ) function.
The While True loop runs over and over again, forever. In the main loop, you make a beep sound with GPIO.output( ) function and "pause" the program for 0.5 second with sleep( ) function.
The While True loop runs over and over again, forever. In the main loop, you make a beep sound with GPIO.output( ) function and "pause" the program for 0.5 second with sleep( ) function.
1 2 3 4 5 6 7 8 9 10 11 12 13 14 15 16 17 18 | #Libraries import RPi.GPIO as GPIO from time import sleep #Disable warnings (optional) GPIO.setwarnings(False) #Select GPIO mode GPIO.setmode(GPIO.BCM) #Set buzzer - pin 23 as output buzzer=23 GPIO.setup(buzzer,GPIO.OUT) #Run forever loop while True: GPIO.output(buzzer,GPIO.HIGH) print ("Beep") sleep(0.5) # Delay in seconds GPIO.output(buzzer,GPIO.LOW) print ("No Beep") sleep(0.5) |
|
Download the code from here and open it with Thonny Python IDE or run it from terminal.
|
| ||||||
Well Done
You have successfully completed one more Raspberry Pi "How to" tutorial and you learned how to use a buzzer.
I hope you liked this, let me know in the comments.
I hope you liked this, let me know in the comments.


