
7/10/2018
|
Available languages:
|

|

|
Introduction
In this tutorial you will learn how to switch on your LED using a button with your Raspberry Pi.
Push buttons or switches connect two points in a circuit when you press them. This tutorial turns on one LED when the button pressed once, and off when pressed twice. Υou will also learn how to use 'flag' variable to control an event.
Let's get started!
Push buttons or switches connect two points in a circuit when you press them. This tutorial turns on one LED when the button pressed once, and off when pressed twice. Υou will also learn how to use 'flag' variable to control an event.
Let's get started!
What you will need - Hardware
|
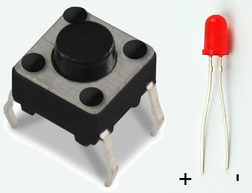
For this tutorial you will need:
|

|
The Circuit
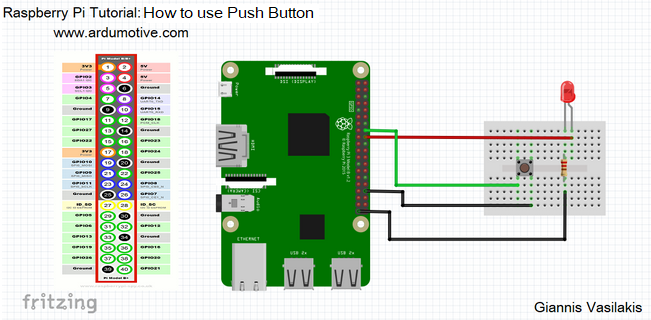
The connections are pretty easy, see the image above with breadboard circuit schematic.
The code
In the program below, the first thing you do is to import the library for GPIO and sleep. The next step is to set the pins of LED and Button. After that setup button as an input and LED as an output.
The While True loop runs over and over again, forever. Also you can turn on your LED with two ways. The first way is the LED lights up as long as the button is pressed and the second way if you press only one time the button then you see your LED on and if you press the button again then the LED is off. The second way is on comments (''') and we use a variable named flag.
The While True loop runs over and over again, forever. Also you can turn on your LED with two ways. The first way is the LED lights up as long as the button is pressed and the second way if you press only one time the button then you see your LED on and if you press the button again then the LED is off. The second way is on comments (''') and we use a variable named flag.
1 2 3 4 5 6 7 8 9 10 11 12 13 14 15 16 17 18 19 20 21 22 23 24 25 26 27 28 29 30 31 32 33 34 | #Libraries import RPi.GPIO as GPIO from time import sleep #Set warnings off (optional) GPIO.setwarnings(False) GPIO.setmode(GPIO.BCM) #Set Button and LED pins Button = 23 LED = 24 #Setup Button and LED GPIO.setup(Button,GPIO.IN,pull_up_down=GPIO.PUD_UP) GPIO.setup(LED,GPIO.OUT) #flag = 0 while True: button_state = GPIO.input(Button) print(button_state) if button_state == 0: GPIO.output(LED,GPIO.HIGH) else: GPIO.output(LED,GPIO.LOW) sleep(1) ''' if button_state==0: sleep(0.5) if flag==0: flag=1 else: flag=0 if flag==1: GPIO.output(LED,GPIO.HIGH) else: GPIO.output(LED,GPIO.LOW) ''' |
|
Download the code from here and open it with Thonny Python IDE or run it from terminal.
|
| ||
Well Done!
You have successfully completed our first Raspberry Pi "How to" tutorial and you learned how to switch on an LED with a button.
Video in Greek language
I hope you liked this, let me know in the comments.