Introduction
|
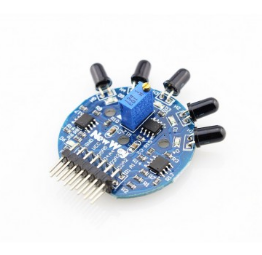
In this tutorial you will learn how to use the flame sensor with Arduino uno. It detects the fire with 5 flame sensors which are arranged with 30 degrees. This module outputs analog signal, which would be more precisely, and also digital signal which would be more easy to use, you can adjust the digital output sensitivety by the on-board potentiometer. The 5 LED indicators are helpful in your debugging, the high-precision resistors (1%) also makes this sensor more precise than other flame sensors.
Features :
|
What you will need - Hardware
|
For this tutorial you will need:
|
The Circuit
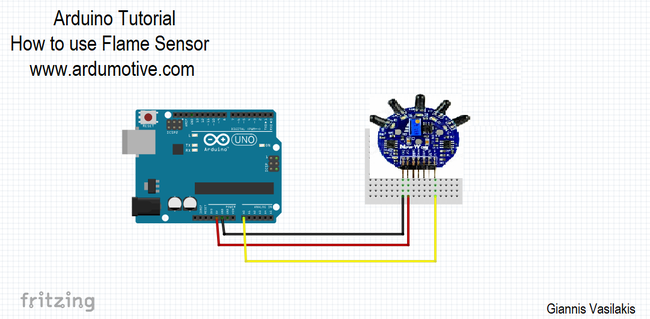
The connections are pretty easy, see the image above with the breadboard circuit schematic.
- GND pin of sensor to GND pin of Arduino
- Vcc pin of sensor to +5Volts (5V) pin of Arduino
- In this tutorial we use A1 pin of sensor (also if you want you can use all analog pins) to A0 pin of Arduino
The code
1 2 3 4 5 6 7 8 9 10 11 12 13 14 15 16 17 18 19 20 21 22 | const int sensorMin = 0; // sensor minimum const int sensorMax = 1024; // sensor maximum void setup() { Serial.begin(9600); } void loop() { // read the sensor on analog A0: int sensorReading = analogRead(A0); int range = map(sensorReading, sensorMin, sensorMax, 0, 3); // range value: switch (range) { case 0: //No fire detected Serial.println("** Νο Fire **"); break; case 1: // A fire between 1-3 feet away. Serial.println("** Fire **"); } delay(1000); } |
|
Download the code from here and open it with Arduino IDE.
|
| ||||||
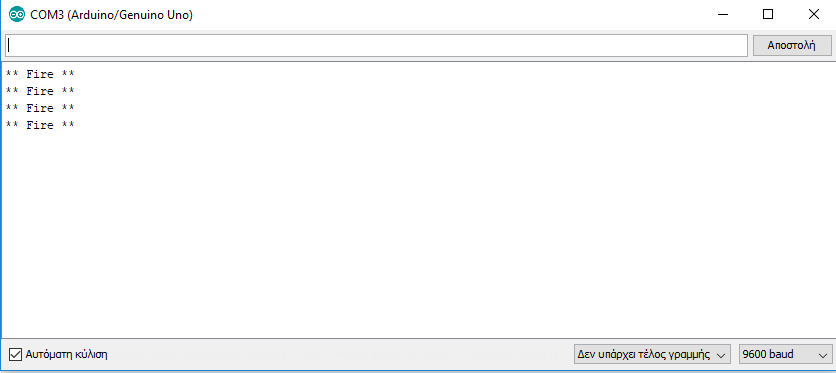
Serial Monitor
If sensor board doesnt detect fire
If sensor board detect fire
Well done!
You have successfully completed one more Arduino "How to" tutorial and you learned how to use the flame sensor with Arduino. I hope you liked this, let me know in the comments.


