
|
Available Languages
|

|

|
*Σύντομα και στα Ελληνικά
Introduction
|
|
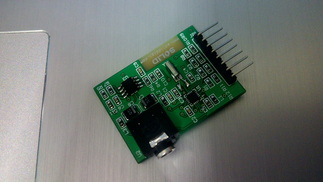
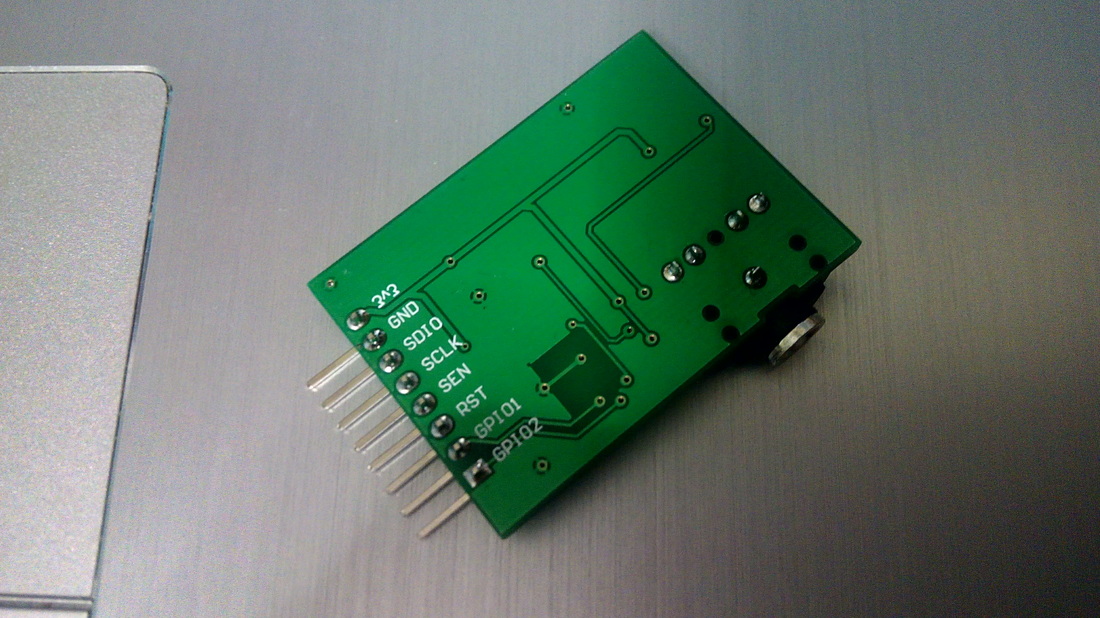
This is an evaluation board for the Silicon Laboratories Si4703 FM tuner chip. Beyond being a simple FM radio, the Si4703 is also capable of detecting and processing both Radio Data Service (RDS) and Radio Broadcast Data Service (RBDS) information.
The board does not have a built-in antenna on it. However, by using headphones or a 3 foot-long 3.5mm audio cable, the wires will function as an antenna!
In this tutorial you will learn how to use it with the Arduino uno board. We will control stations and read RDS messages through the serial monitor of Codebender.
So, let's get started!
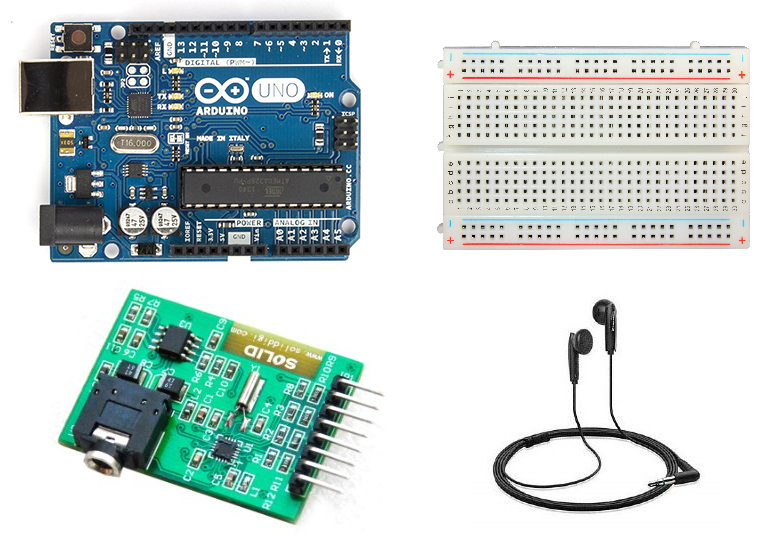
What you will need - Hardware
|
For this tutorial you will need:
|
|
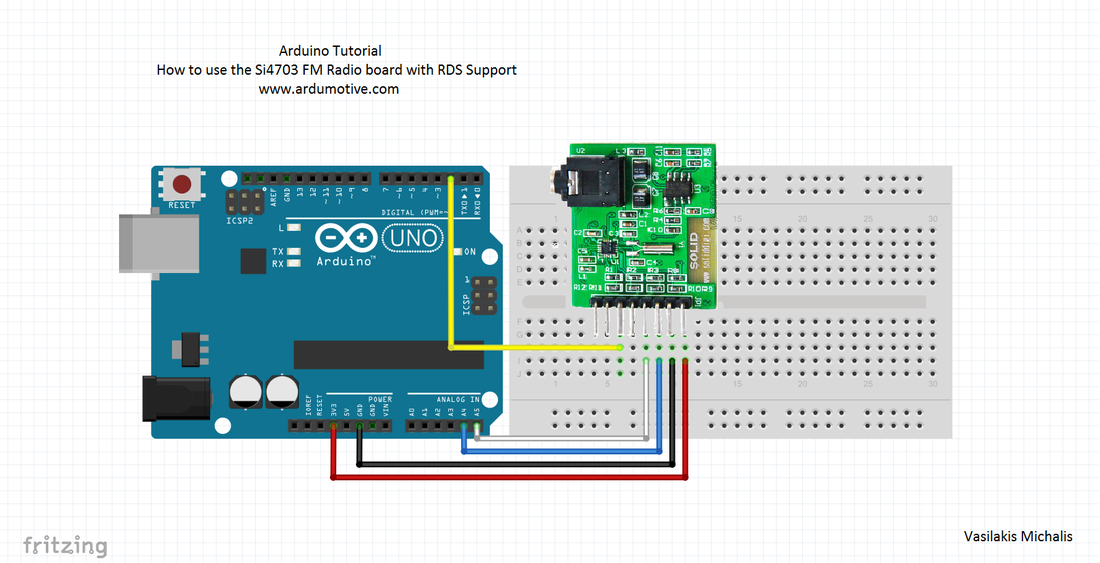
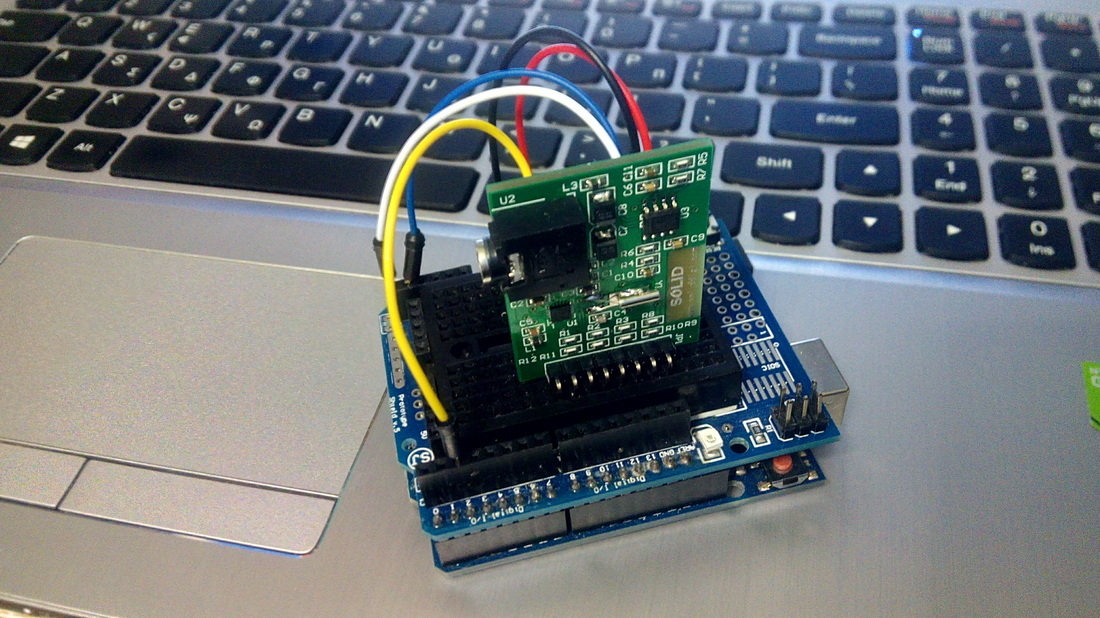
The Circuit
|
|
The connections are pretty easy, see the above image with the breadboard circuit schematic.
|
The code
1 2 3 4 5 6 7 8 9 10 11 12 13 14 15 16 17 18 19 20 21 22 23 24 25 26 27 28 29 30 31 32 33 34 35 36 37 38 39 40 41 42 43 44 45 46 47 48 49 50 51 52 53 54 55 56 57 58 59 60 61 62 63 64 65 66 67 68 69 70 71 72 73 74 75 76 77 78 79 80 81 | #include <SparkFunSi4703.h> #include <Wire.h> const int resetPin = 2; const int SDIO = A4; const int SCLK = A5; Si4703_Breakout radio(resetPin, SDIO, SCLK); int channel; int volume; char rdsBuffer[10]; void setup() { Serial.begin(9600); Serial.println("\n\nSi4703_Breakout Test Sketch"); Serial.println("==========================="); Serial.println("a b Favourite stations"); Serial.println("+ - Volume (max 15)"); Serial.println("u d Seek up / down"); Serial.println("r Listen for RDS Data (15 sec timeout)"); Serial.println("Send me a command letter."); radio.powerOn(); radio.setVolume(0); } void loop() { if (Serial.available()) { char ch = Serial.read(); if (ch == 'u') { channel = radio.seekUp(); displayInfo(); } else if (ch == 'd') { channel = radio.seekDown(); displayInfo(); } else if (ch == '+') { volume ++; if (volume == 16) volume = 15; radio.setVolume(volume); displayInfo(); } else if (ch == '-') { volume --; if (volume < 0) volume = 0; radio.setVolume(volume); displayInfo(); } else if (ch == 'a') { channel = 930; // Rock FM radio.setChannel(channel); displayInfo(); } else if (ch == 'b') { channel = 974; // BBC R4 radio.setChannel(channel); displayInfo(); } else if (ch == 'r') { Serial.println("RDS listening"); radio.readRDS(rdsBuffer, 15000); Serial.print("RDS heard:"); Serial.println(rdsBuffer); } } } void displayInfo() { Serial.print("Channel:"); Serial.print(channel); Serial.print(" Volume:"); Serial.println(volume); } |
|
Download the code from here and open it with Arduino IDE. Inside you will also find additional libraries.
|
| ||
You can change or add favorite stations by changing the code below:
else if (ch == 'a') <--- By sending 'a'
{ channel = 930; <--- will go to station 93.0
radio.setChannel(channel);
displayInfo();
}
else if (ch == 'a') <--- By sending 'a'
{ channel = 930; <--- will go to station 93.0
radio.setChannel(channel);
displayInfo();
}
Testing
|
|
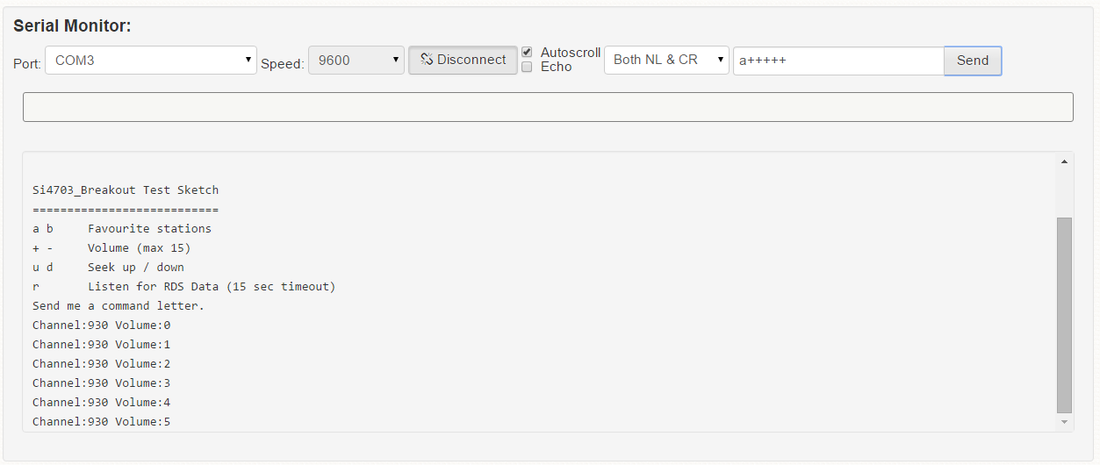
Open the serial monitor from tools menu of Arduino IDE.
By default volume is set to 0. You can change the volume level by sending the "+" or "-" symbol. You can also combine commands. For example is you send "a+++++++++" will go to favorite station 'a' (93.0 set to code) and change the volume to 9. |
Well done!
You have successfully completed one more "How to" tutorial and you learned how to use the TEA5767 FM radio module with the Arduino uno board.
What next? You can make your own digital fm radio for your desk with LCD display and speakers, check this project here.
I hope you liked this, let me know in the comments.
What next? You can make your own digital fm radio for your desk with LCD display and speakers, check this project here.
I hope you liked this, let me know in the comments.


