
|
Available Languages
|

|

|
*Σύντομα και στα Ελληνικά
Introduction
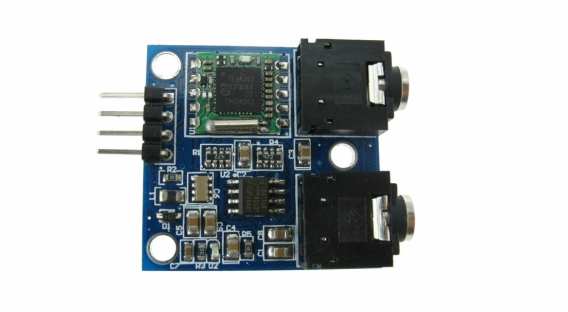
In this tutorial you will learn how to use the TEA5767 FM radio module with Arduino uno board. These modules use I2C and are available on eBay for just a few dollars each. It has two 3.5mm jack outputs, one for the antenna cable and one for the headphones.
If you want to find more technical details about the TEA5767 chip you can read its datasheet here.
We will use the serial monitor of Codebender to print out the current frequency and search for next/previous stations.
Let's get started!
If you want to find more technical details about the TEA5767 chip you can read its datasheet here.
We will use the serial monitor of Codebender to print out the current frequency and search for next/previous stations.
Let's get started!
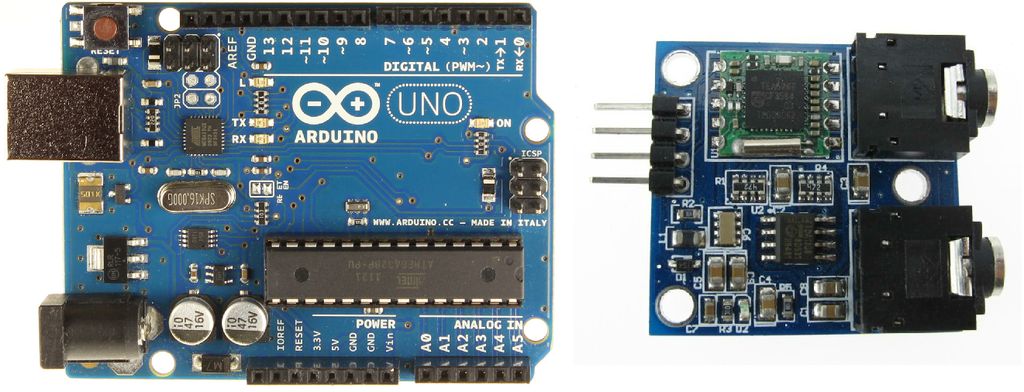
What you will need - Hardware
|
For this tutorial you will need:
|
|
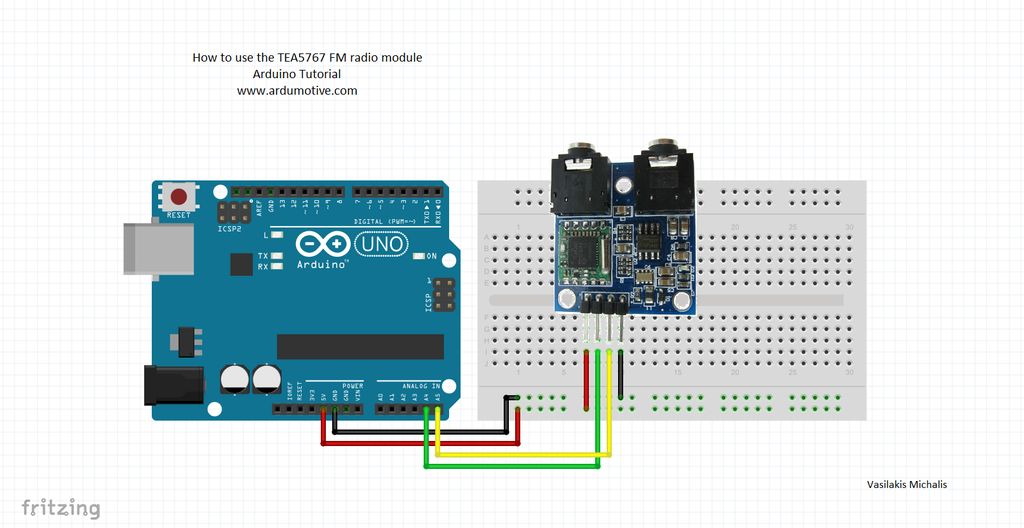
The Circuit
|
|
The connections are pretty easy, see the image above with the breadboard circuit schematic.
|
The code
1 2 3 4 5 6 7 8 9 10 11 12 13 14 15 16 17 18 19 20 21 22 23 24 25 26 27 28 29 30 31 32 33 34 35 36 37 38 39 40 41 42 43 44 45 46 47 48 49 50 51 52 53 54 55 56 57 58 59 60 61 62 63 64 65 66 67 68 69 70 71 72 73 74 75 76 77 78 79 80 81 82 83 84 85 86 87 88 | /* How to use the TEA5767 FM radio Module with Arduino More info: http://www.ardumotive.com/how-to-use-the-tea5767-fm-radio-module-en.html Dev: Vasilakis Michalis // Date: 21/9/2015 // www.ardumotive.com */ //Libraries: #include <TEA5767.h> #include <Wire.h> //Constants: TEA5767 Radio; //Pinout SLC and SDA - Arduino uno pins A5 and A4 //Variables: double old_frequency; double frequency; int search_mode = 0; int search_direction; unsigned long last_pressed; unsigned char buf[5]; int stereo; int signal_level; double current_freq; unsigned long current_millis = millis(); int inByte; int flag=0; void setup () { //Init Serial.begin(9600); Radio.init(); Radio.set_frequency(95.2); //On power on go to station 95.2 } void loop () { if (Serial.available()>0) { inByte = Serial.read(); if (inByte == '+' || inByte == '-'){ //accept only + and - from keyboard flag=0; } } if (Radio.read_status(buf) == 1) { current_freq = floor (Radio.frequency_available (buf) / 100000 + .5) / 10; stereo = Radio.stereo(buf); signal_level = Radio.signal_level(buf); //By using flag variable the message will be printed only one time. if(flag == 0){ Serial.print("Current freq: "); Serial.print(current_freq); Serial.print("MHz Signal: "); //Strereo or mono ? if (stereo){ Serial.print("STEREO "); } else{ Serial.print("MONO "); } Serial.print(signal_level); Serial.println("/15"); flag=1; } } //When button pressed, search for new station if (search_mode == 1) { if (Radio.process_search (buf, search_direction) == 1) { search_mode = 0; } } //If forward button is pressed, go up to next station if (inByte == '+') { last_pressed = current_millis; search_mode = 1; search_direction = TEA5767_SEARCH_DIR_UP; Radio.search_up(buf); } //If backward button is pressed, go down to next station if (inByte == '-') { last_pressed = current_millis; search_mode = 1; search_direction = TEA5767_SEARCH_DIR_DOWN; Radio.search_down(buf); } delay(500); } |
|
Download the code from here and open it with Arduino IDE. Inside you will also find additional libraries.
|
| ||
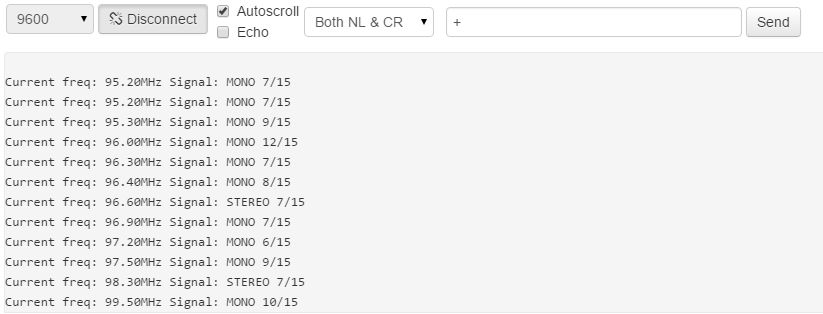
Testing
|
|
Open the serial monitor from tools menu of Arduino IDE. Send '+' or '-' to go to next or previous station/frequency. |
Well done!
You have successfully completed one more "How to" tutorial and you learned how to use the TEA5767 FM radio module with the Arduino uno board.
What next? You can make your own digital fm radio for your desk with LCD display and speakers, check this project here.
I hope you liked this, let me know in the comments.
What next? You can make your own digital fm radio for your desk with LCD display and speakers, check this project here.
I hope you liked this, let me know in the comments.


