
|
Available Languages
|

|

|
Introduction |
Published date: 26/7/2017
|
|
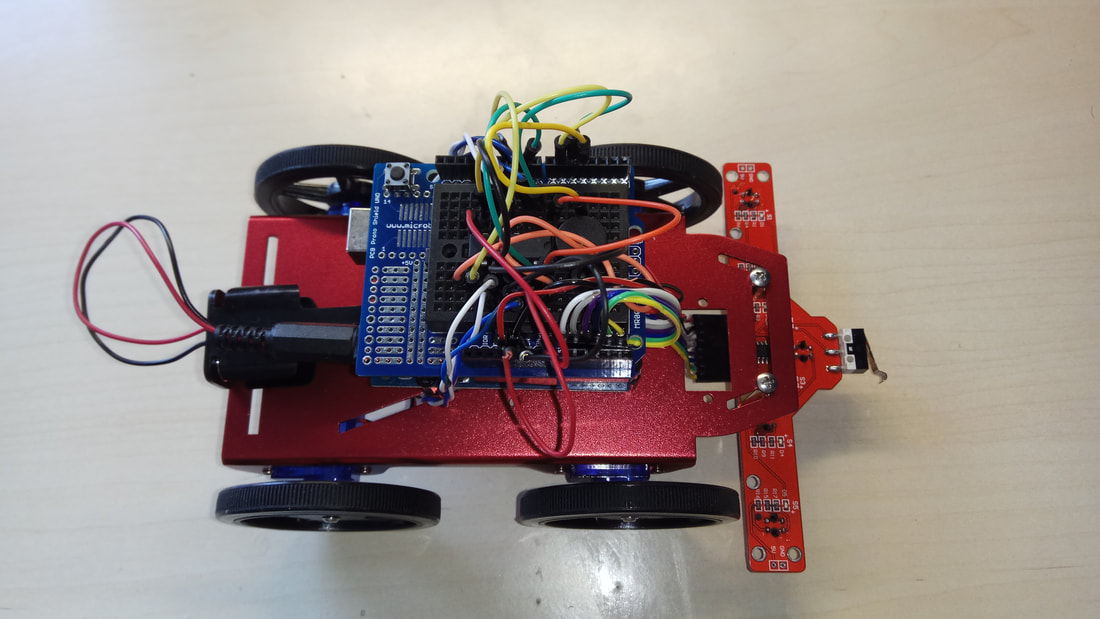
Well, if you are a beginner, here you will find the easiest way to build your own black line following robot!
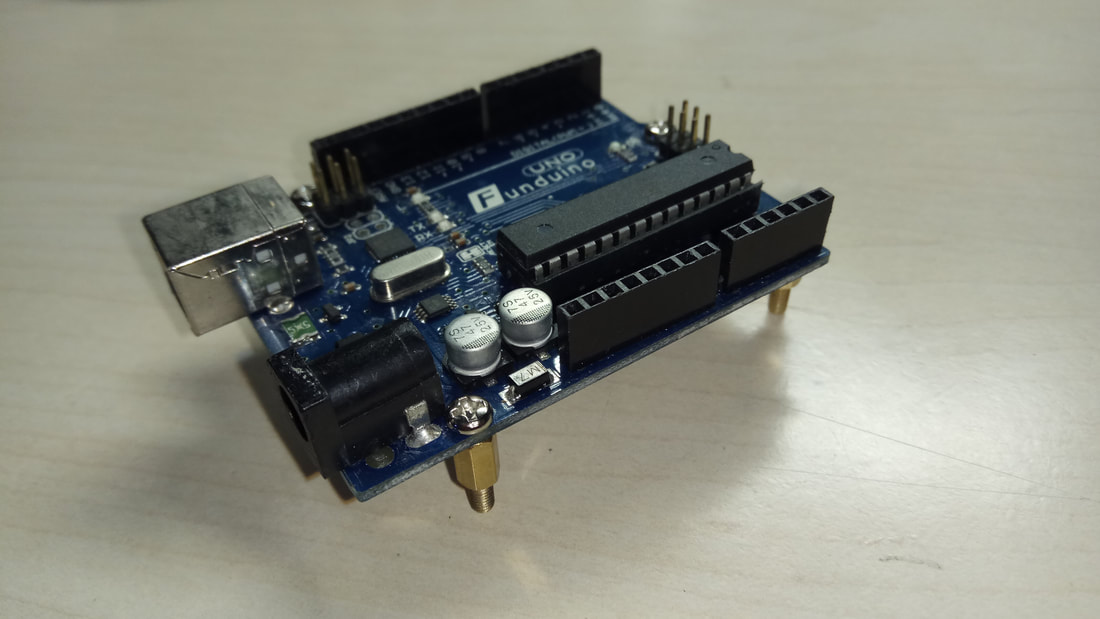
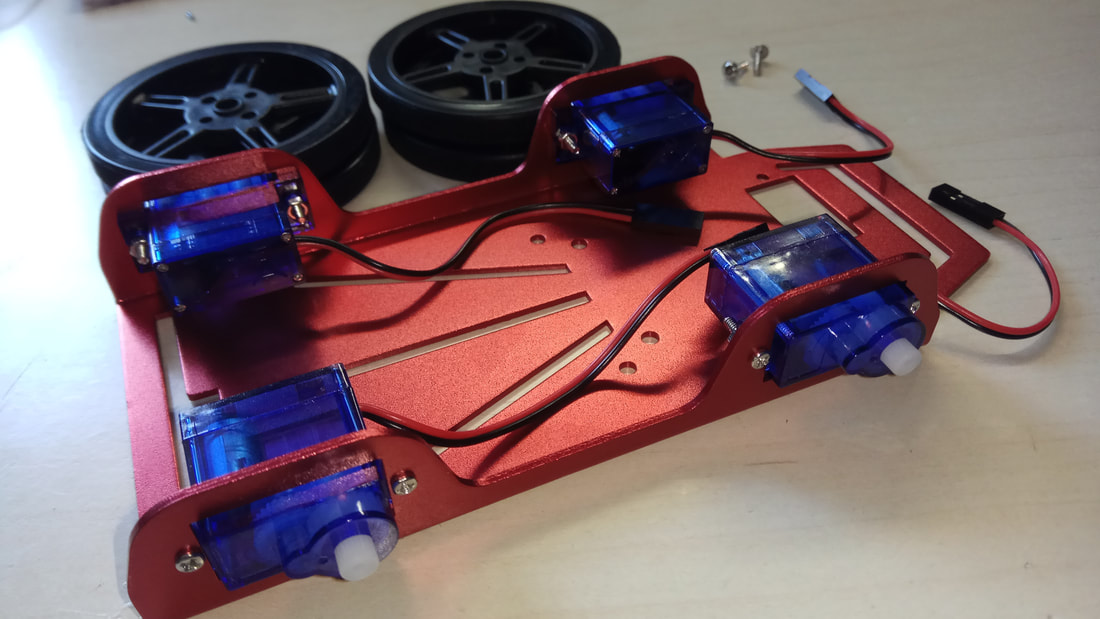
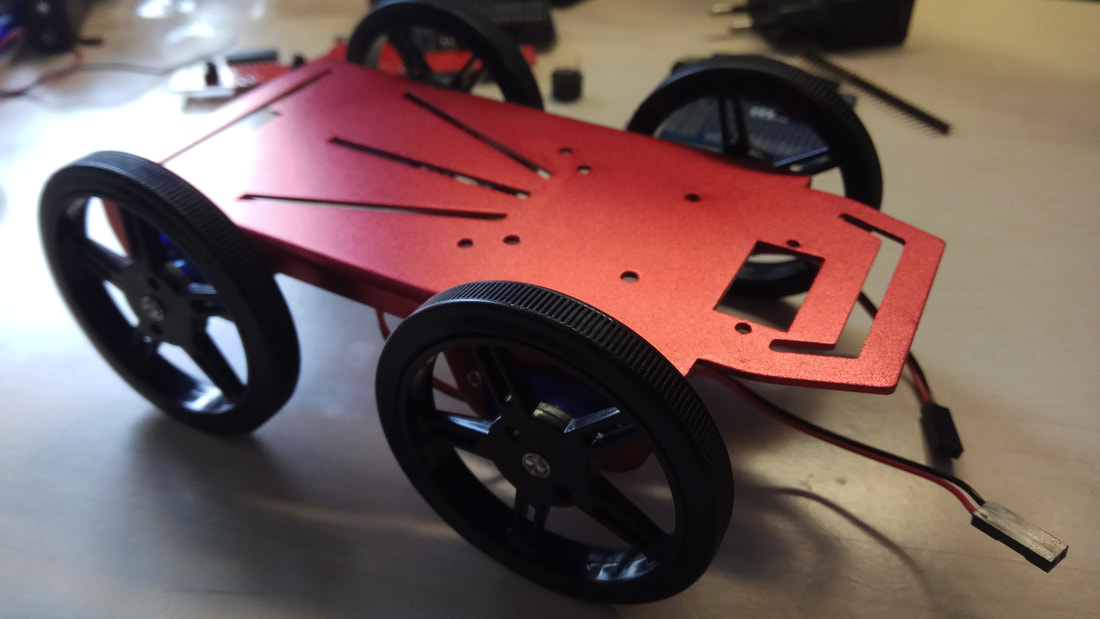
We will use a mini rover robot chassis with four small dc motors to build it easier. For one more time we choose to use the famous Arduino UNO board. Are you ready? Let's get started! |

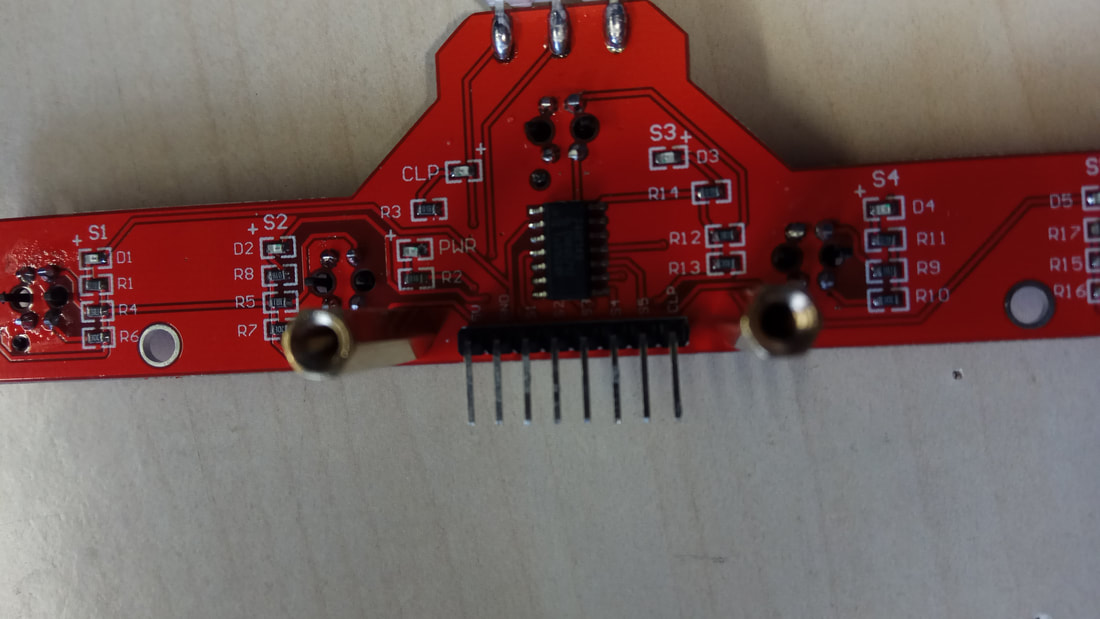
Our small robot will start to follow the black line when we press ones the button in front of it. If we press it again it will stop. The sensor board that we are using has 5 ir sensors. We will use only 3 of them, the center one for tracking the black line and the left/right of it to make the corrections to the robot's route. Our robot will stop when all sensors detect a black line. Watch the "Robot in Action" video below..
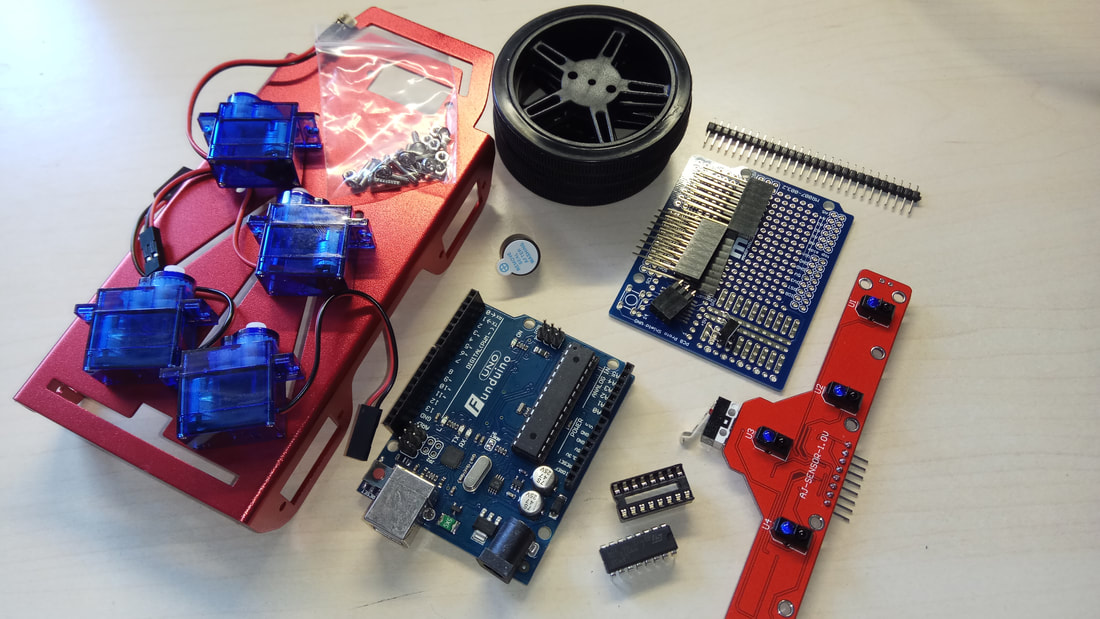
What you will need - Hardware
|
For this project you will need:
You will also need some cables and some extra spacers. Tools: Screwdriver |
|
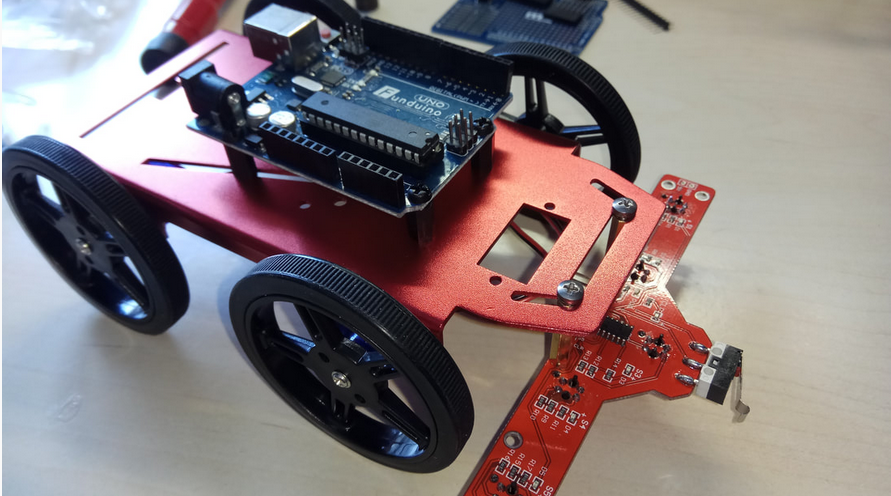
Assembly the Mini Round Robot Chassis Kit
Follow the images below !

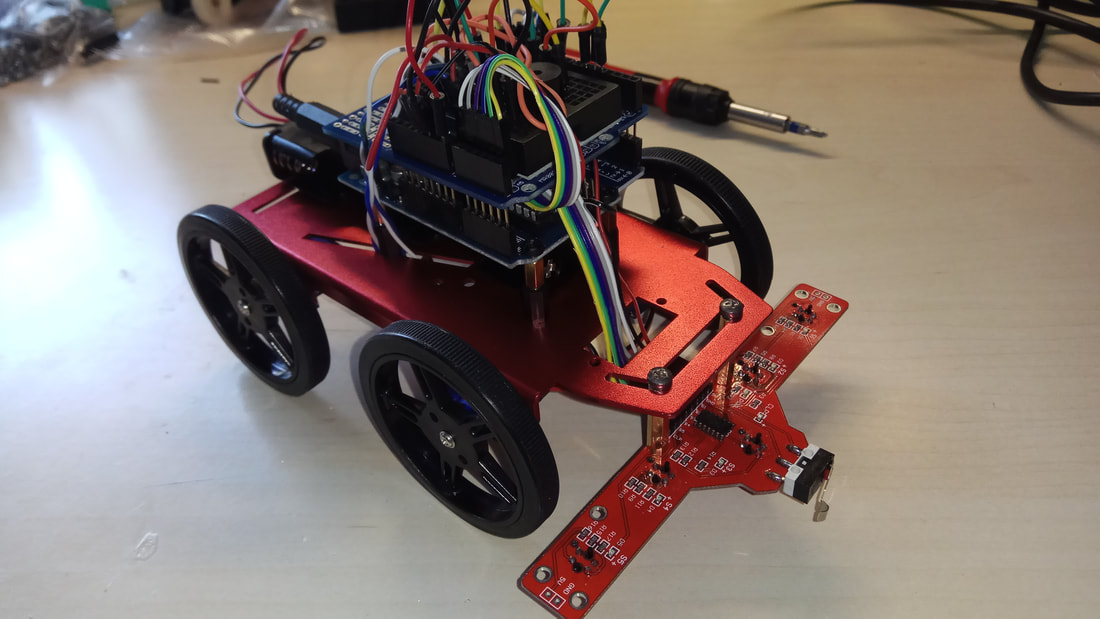
The circuit
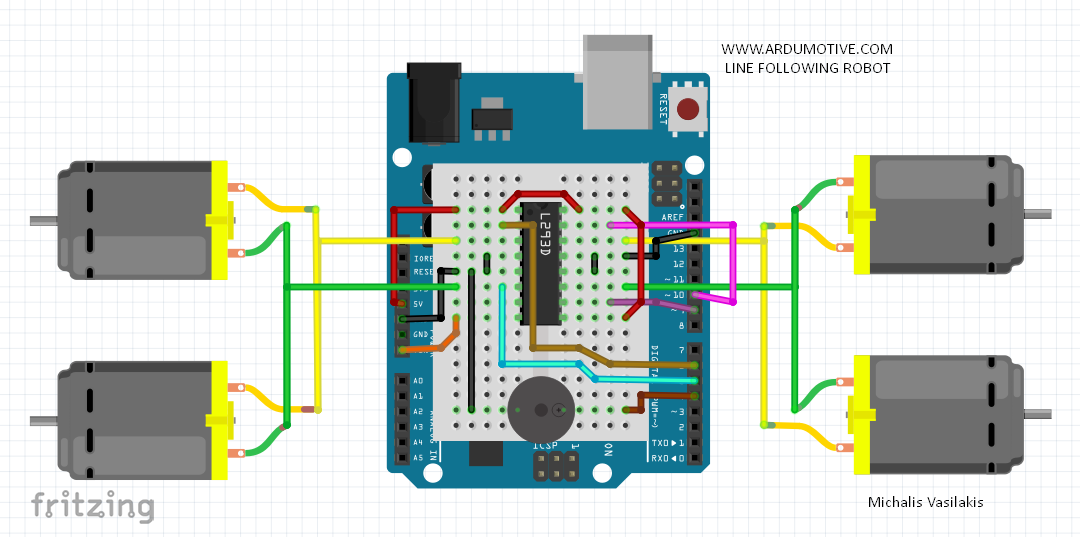
The connections are pretty easy, take your time and follow the "colors".
About "Line Follower Detector 5-Channels" pcb
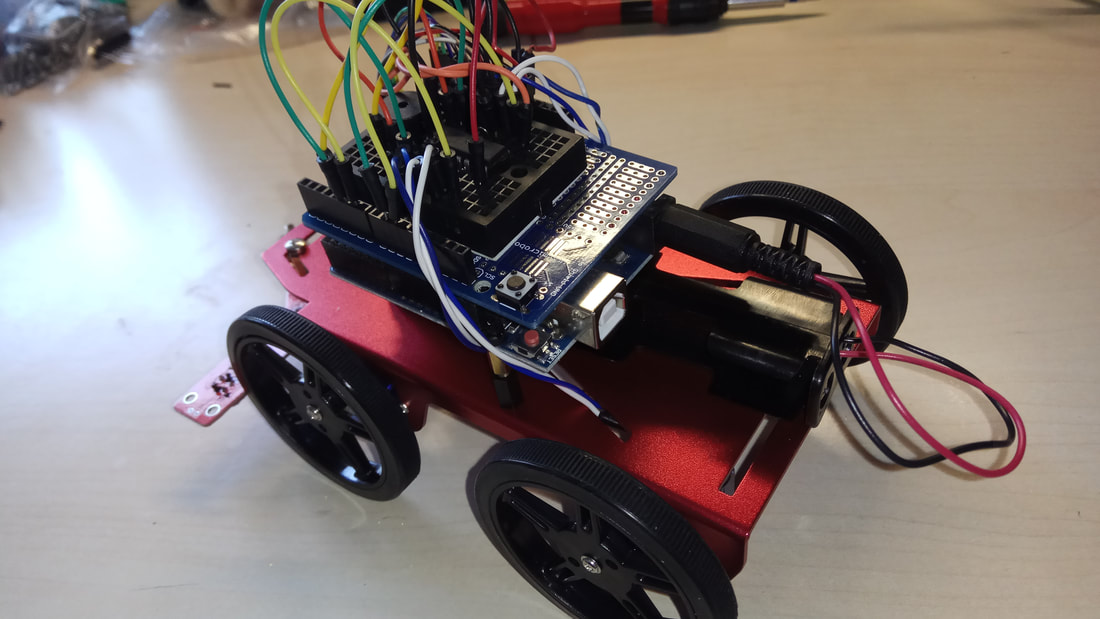
Power - Battery holder
Connect the battery holder cables with a dc jack to the Arduino uno (or to Vin and gnd pin). If you want you can add an ON/OFF SW on the red cable of your battery holder pack.
About "Line Follower Detector 5-Channels" pcb
- Connect the 5V pin to Arduino 5V pin, GND to Arduino GND
- Sensor "2" to Arduino A1 pin
- Sensor "3" to Arduino A2 pin
- Sensor "4" to Arduino A3 pin
- Button SW to Arduino A5 pin
Power - Battery holder
Connect the battery holder cables with a dc jack to the Arduino uno (or to Vin and gnd pin). If you want you can add an ON/OFF SW on the red cable of your battery holder pack.
The code
Make it alive by program it with the following code!
We will use the front button to start our program (or to stop it if you press it twice)
If your robot doesn't move forward, go to lines 26 and 27 and change the PWM values until your robot moves straight.
We will use the front button to start our program (or to stop it if you press it twice)
If your robot doesn't move forward, go to lines 26 and 27 and change the PWM values until your robot moves straight.
1 2 3 4 5 6 7 8 9 10 11 12 13 14 15 16 17 18 19 20 21 22 23 24 25 26 27 28 29 30 31 32 33 34 35 36 37 38 39 40 41 42 43 44 45 46 47 48 49 50 51 52 53 54 55 56 57 58 59 60 61 62 63 64 65 66 67 68 69 70 71 72 73 74 75 76 77 78 79 80 81 82 83 84 85 86 87 88 89 90 91 92 93 94 95 96 97 98 99 100 101 102 103 104 105 106 107 108 109 110 111 112 113 114 115 116 117 118 119 120 121 122 123 124 125 126 127 128 129 | /* * Arduino Line Following Robot * Dev: Michalis Vasilakis // Date: 16/7/2017 * More info can be found at http://www.ardumotive.com */ //Constants - Connections const int buzzer = 4; const int motorA1 = 5; //Left Motor const int motorA2 = 6; const int motorB1 = 10; //Right Motor const int motorB2 = 9; const int sensor2 = A1; //Left infrared sensor const int sensor3 = A2; //Middle infrared sensor const int sensor4 = A3; //Right infrared sensor const int button = A5; //On first click: Start / On second click: Stop //Variables int leftSensor; int rightSensor; int middleSensor; int buttonState; boolean start = false; //For motor speed - pwm int speedLeft = 235; int speedRight = 255; void setup(){ //Define I/O pins pinMode(buzzer, OUTPUT); pinMode(motorA1, OUTPUT); pinMode(motorA2, OUTPUT); pinMode(motorB1, OUTPUT); pinMode(motorB2, OUTPUT); Serial.begin(9600); } void loop(){ middleSensor = digitalRead(sensor3); Serial.print(middleSensor); buttonState = digitalRead(button); //Read button state if (buttonState==HIGH){ while(buttonState==HIGH){ //Wait until button is unpressed! buttonState = digitalRead(button); delay(10); } Serial.println("Button"); //Init condition: robot is stopped, on first press: robot is moving, on second press: robot is stopped. if (!start){ start = true; } else{ start = false; } delay(250); } if (!start){ stop(); // Stop the robot! } else{ leftSensor = digitalRead(sensor2); middleSensor = digitalRead(sensor3); rightSensor = digitalRead(sensor4); //Follow black line: Black 1 / White 0 if (leftSensor==HIGH && rightSensor==HIGH && middleSensor==LOW){ // Black line is in the middle - Sensors are looking "white", so move forward forward(); noTone(buzzer); } else if (leftSensor==LOW && rightSensor==HIGH && (middleSensor==LOW || middleSensor==HIGH)){ //Left sensor detect black line, turn right to correct robot route right(); tone(buzzer,500); } else if (leftSensor==HIGH && rightSensor==LOW && (middleSensor==LOW || middleSensor==HIGH)){ //Right sensor detect black line, turn left to correct robot route left(); tone(buzzer,500); } else if (leftSensor==LOW && rightSensor==LOW && middleSensor==LOW){ //Finish line detected! Stop the robot stop(); tone(buzzer,800,1000); start = false; } /* else if (leftSensor==HIGH && rightSensor==HIGH && middleSensor==HIGH){ // No line detected? Well, do something or stop it. stop(); tone(buzzer,200,1000); start = false; }*/ } } //Moving functions void forward(){ analogWrite(motorA1, speedLeft); analogWrite(motorA2, 0); analogWrite(motorB1, speedRight); analogWrite(motorB2, 0); } void backward(){ analogWrite(motorA1, 0); analogWrite(motorA2, speedLeft); analogWrite(motorB1, 0); analogWrite(motorB2, speedRight); } void left(){ analogWrite(motorA1, speedLeft); analogWrite(motorA2, 0); analogWrite(motorB1, 0); analogWrite(motorB2, speedRight); } void right(){ analogWrite(motorA1, 0); analogWrite(motorA2, speedLeft); analogWrite(motorB1, speedRight); analogWrite(motorB2, 0); } void stop(){ analogWrite(motorA1, 0); analogWrite(motorA2, 0); analogWrite(motorB1, 0); analogWrite(motorB2, 0); } |
|
Download the code from here and open it with Arduino IDE.
|
| ||
Well Done!
|
Well...that's it!
Make a black line track and test your new robot! The black line must have width: 30mm. Or you can download and print our sketch (open it with Corel Draw) I hope you liked this, let me know in the comments! Post me some photos of your Arduino robot! |
| ||


