
|
Available Languages
|

|

|
Introduction

|
|
In this tutorial you will learn how to use one water flow sensor with an Arduino board.
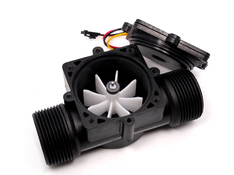
The water flow sensor consists of a plastic valve body, a water rotor and a hall-effect sensor. When the water flows through the rotor, rotor rolls and the speed of it changes with a different rate of flow. The hall-effect sensor outputs the corresponding pulse signal.
This type of sensor can be found on different diameters, water pressure (MPa) and flow rate (L/m) ranges. Make sure to select one that will cover your needs. The sensor that I have it has 20mm diameter, <1.75Mpa water pressure and ~30 L/m flow rate range.
In this tutorial we will use the serial monitor for printing the water flow rate in liters per hour and the total of liters flowed since starting.
So let's get started!
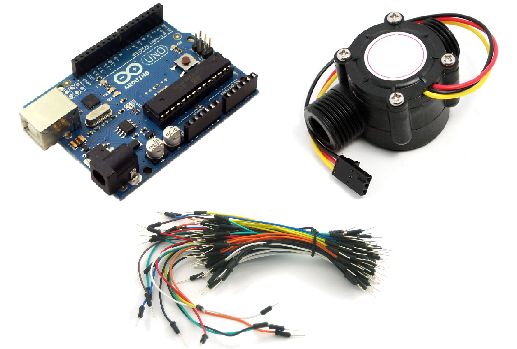
What you will need - Hardware
|
For this tutorial you will need:
|
|
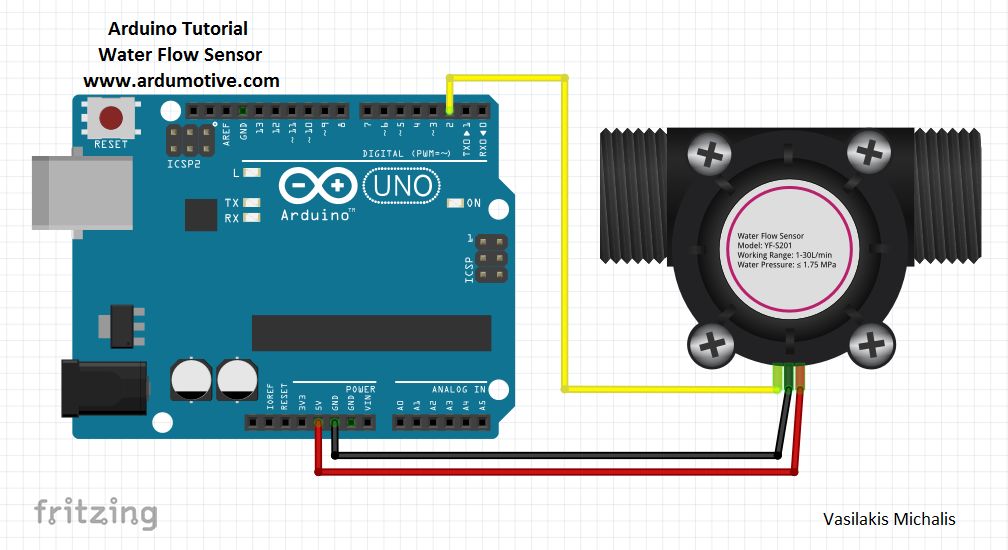
The Circuit
|
|
The connections are pretty easy, see the image above with the breadboard circuit schematic.
|
The code using Codebender
Here's the code, embedded using Codebender!
Try downloading the Codebender plugin and clicking on the "Run on Arduino" button to program your Arduino board with this sketch. And that's it, you've programmed your Arduino with this sketch.
Try downloading the Codebender plugin and clicking on the "Run on Arduino" button to program your Arduino board with this sketch. And that's it, you've programmed your Arduino with this sketch.
You can keep playing with that by clicking the "Edit" button and start making your own modifications to the code. For example you can change in the line 58 the "1000" ms delay time.
Serial Monitor - Testing

Press the connect button below to start the serial communication.
Connect your sensor with your water tap, or just blow on it.
Note: The back side of the sensor show with one arrow the correct flow side.
Connect your sensor with your water tap, or just blow on it.
Note: The back side of the sensor show with one arrow the correct flow side.
Well done!
You have successfully completed one more Arduino "How to" tutorial and you learned how to use the water flow sensor.
I hope you liked this, let me know in the comments.
I hope you liked this, let me know in the comments.


