
|
Available Languages
|

|

|
Introduction |
Published date: 2/4/2017
|
|
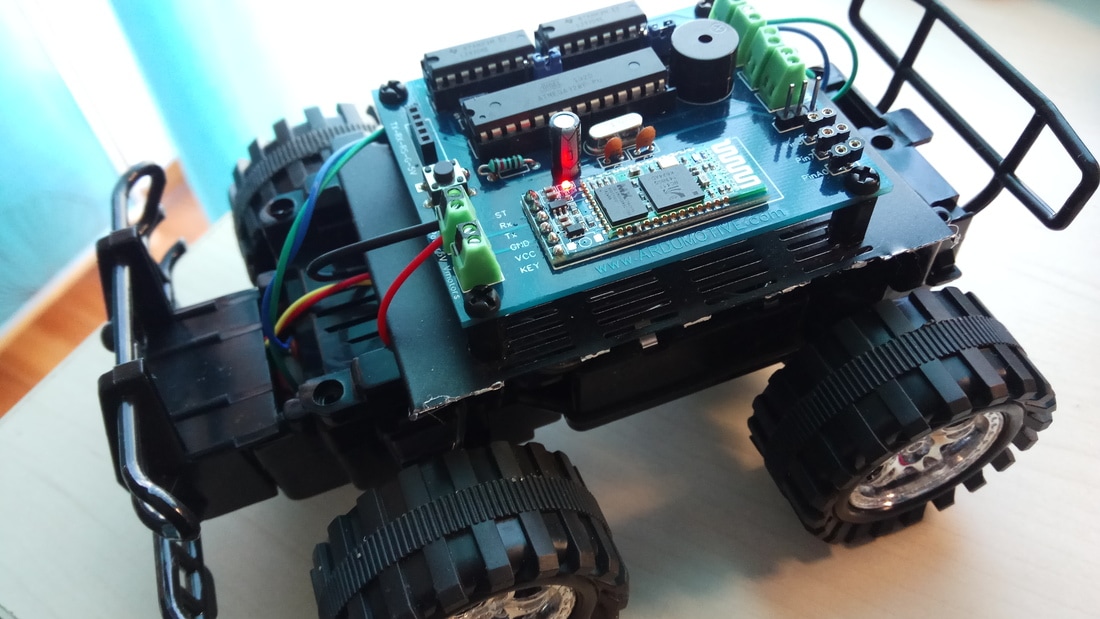
In this "how to" guide i will show you how to make your own Arduino bluetooth car. We used the online circuit design platform EasyEDA to produse our custom - Arduino UNO based - PCB board.
Below you will also find our project files to easyeda.com so you can easily produse the main circuit. So, let's get started. |
What you will need - Hardware
|
For this project you will need:
|
|
You will also need a TTL to USB module or an Arduino UNO board for the programming procedure.
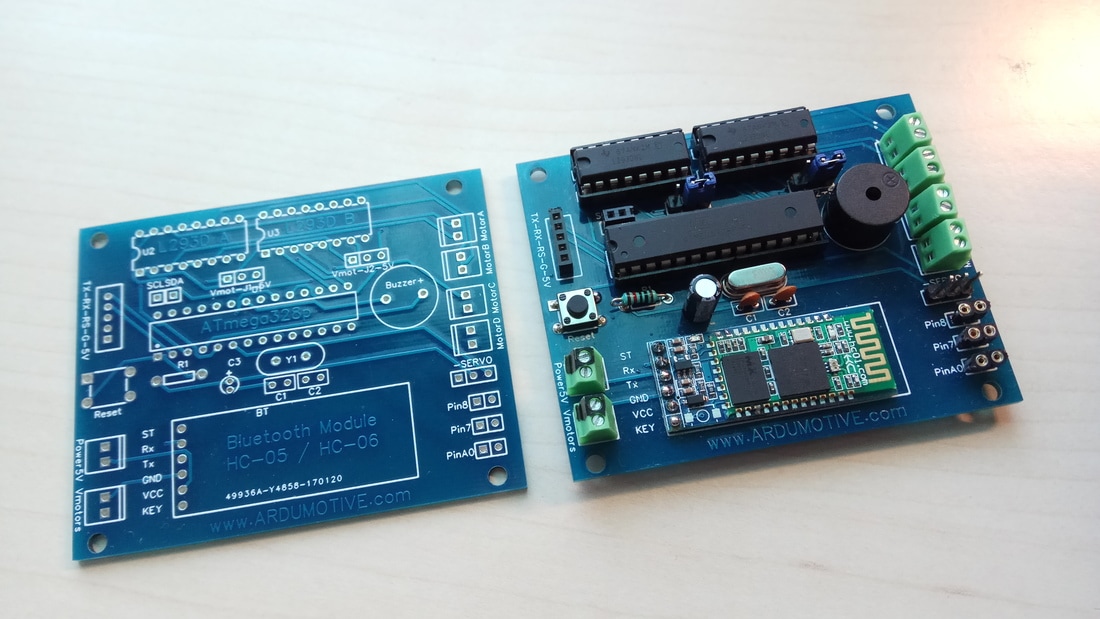
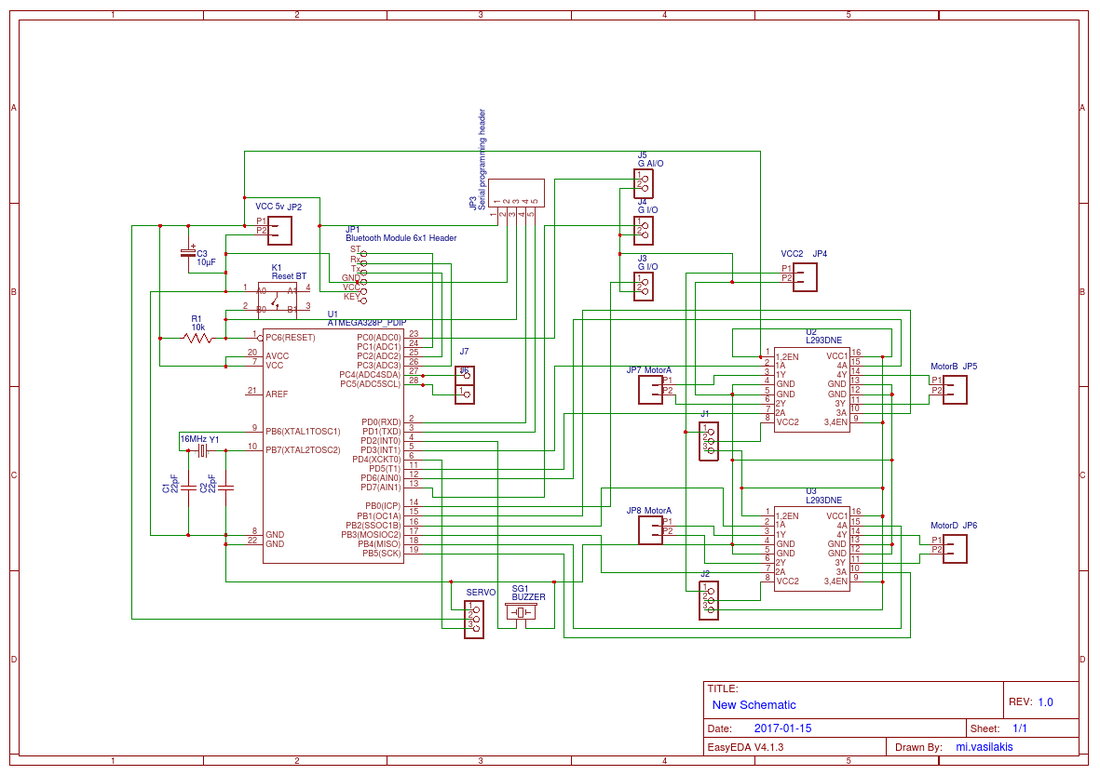
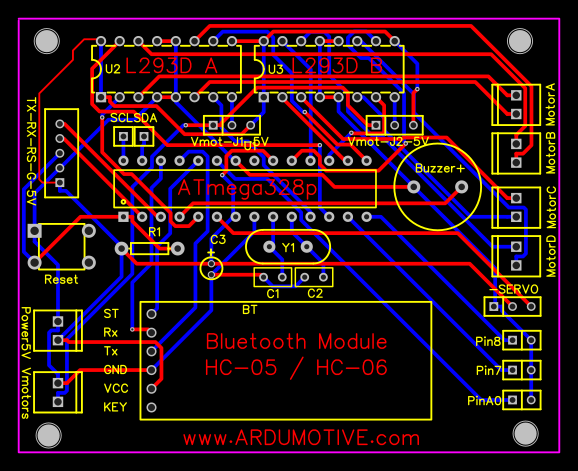
The circuit at EasyEDA, the free online circuit design platoform
|
|
Enter here to produce our custom made board.
EasyEDA is a free, zero- install, cloud-based EDA tool, designed to give electrical engineers, educators, engineering students and electronics hobbyists an Easier EDA Experience. It is easy to use circuit design, circuit simulator and PCB design that runs in your web browser. |
|

|
The code
Connect your circuit with TTL to USB module with 5 cables to the programming header. The pins RX and TX must be cross-connected.
NOTE: If you are using the Arduino UNO board make sure to remove the ATmega328 IC from it first and connect the headers RX to RX and TX to TX pins of the board. The RS pin must be connected to Arduino UNO reset pin.
NOTE: If you are using the Arduino UNO board make sure to remove the ATmega328 IC from it first and connect the headers RX to RX and TX to TX pins of the board. The RS pin must be connected to Arduino UNO reset pin.
1 2 3 4 5 6 7 8 9 10 11 12 13 14 15 16 17 18 19 20 21 22 23 24 25 26 27 28 29 30 31 32 33 34 35 36 37 38 39 40 41 42 43 44 45 46 47 48 49 50 51 52 53 54 55 56 57 58 59 60 61 62 63 64 65 66 67 68 69 70 71 72 73 74 75 76 77 78 79 80 81 82 83 84 85 86 87 88 89 90 91 92 93 94 95 96 97 98 99 100 101 102 103 104 105 106 107 108 109 110 111 112 113 114 115 116 117 118 119 120 121 122 123 | /* Arduino Bluetooth Car * Created by Vasilakis Michalis // 2/4/17 * More information at www.ardumotive.com */ #include <SoftwareSerial.h> //Software serial connection SoftwareSerial btSerial(A2,A3); // RX & TX //L293 Connection const int motorA1 = 5; // Pin 2 of L293 const int motorA2 = 3; // Pin 7 of L293 const int motorB1 = 11; // Pin 10 of L293 const int motorB2 = 10; // Pin 14 of L293 //Leds connected to Arduino UNO Pin 12 const int lights = 8; //Buzzer / Speaker to Arduino UNO Pin 3 const int buzzer = 2 ; //Useful Variables int i=0; int j=0; int state; void setup() { // Set pins as outputs: pinMode(motorA1, OUTPUT); pinMode(motorA2, OUTPUT); pinMode(motorB1, OUTPUT); pinMode(motorB2, OUTPUT); pinMode(lights, OUTPUT); // Initialize serial communication at 9600 bits per second: btSerial.begin(9600); Serial.begin(9600); } void loop() { //Save income data to variable 'state' if(btSerial.available() > 0){ state = btSerial.read(); Serial.println(state); } /***********************Forward****************************/ //If state is equal with letter 'F', car will go forward! if (state == 'F') { digitalWrite(motorA1, HIGH); digitalWrite(motorA2, 0); digitalWrite(motorB1, 0); digitalWrite(motorB2, 0); } /**********************Forward Left************************/ //If state is equal with letter 'G', car will go forward left else if (state == 'G') { digitalWrite(motorA1, HIGH); digitalWrite(motorA2, 0); digitalWrite(motorB1, HIGH); digitalWrite(motorB2, 0); } /**********************Forward Right************************/ //If state is equal with letter 'I', car will go forward right else if (state == 'I') { digitalWrite(motorA1, HIGH); digitalWrite(motorA2, 0); digitalWrite(motorB1, 0); digitalWrite(motorB2, HIGH); } /***********************Backward****************************/ //If state is equal with letter 'B', car will go backward else if (state == 'B') { digitalWrite(motorA1, 0); digitalWrite(motorA2, HIGH); digitalWrite(motorB1, 0); digitalWrite(motorB2, 0); } /**********************Backward Left************************/ //If state is equal with letter 'H', car will go backward left else if (state == 'H') { digitalWrite(motorA1, 0); digitalWrite(motorA2, HIGH); digitalWrite(motorB1, HIGH); digitalWrite(motorB2, 0); } /**********************Backward Right************************/ //If state is equal with letter 'J', car will go backward right else if (state == 'J') { digitalWrite(motorA1, 0); digitalWrite(motorA2, HIGH); digitalWrite(motorB1, 0); digitalWrite(motorB2, HIGH); } /***************************Left*****************************/ //If state is equal with letter 'L', wheels will turn left else if (state == 'L') { digitalWrite(motorA1, 0); digitalWrite(motorA2, 0); digitalWrite(motorB1, HIGH); digitalWrite(motorB2, 0); } /***************************Right*****************************/ //If state is equal with letter 'R', wheels will turn right else if (state == 'R') { digitalWrite(motorA1, 0); digitalWrite(motorA2, 0); digitalWrite(motorB1, 0); digitalWrite(motorB2, HIGH); } /************************Lights*****************************/ //If state is equal with letter 'W', turn leds on or of off else if (state == 'W') { if (i==0){ digitalWrite(lights, HIGH); i=1; } else if (i==1){ digitalWrite(lights, LOW); i=0; } state='n'; } /**********************Horn sound***************************/ //If state is equal with letter 'V', play (or stop) horn sound else if (state == 'V'){ if (j==0){ tone(buzzer, 1000);//Speaker on j=1; } else if (j==1){ noTone(buzzer); //Speaker off j=0; } state='n'; } /************************Stop*****************************/ //If state is equal with letter 'S', stop the car else if (state == 'S'){ digitalWrite(motorA1, 0); digitalWrite(motorA2, 0); digitalWrite(motorB1, 0); digitalWrite(motorB2, 0); } } |
|
Download the code from here and open it with Arduino IDE.
|
| ||
Android Application
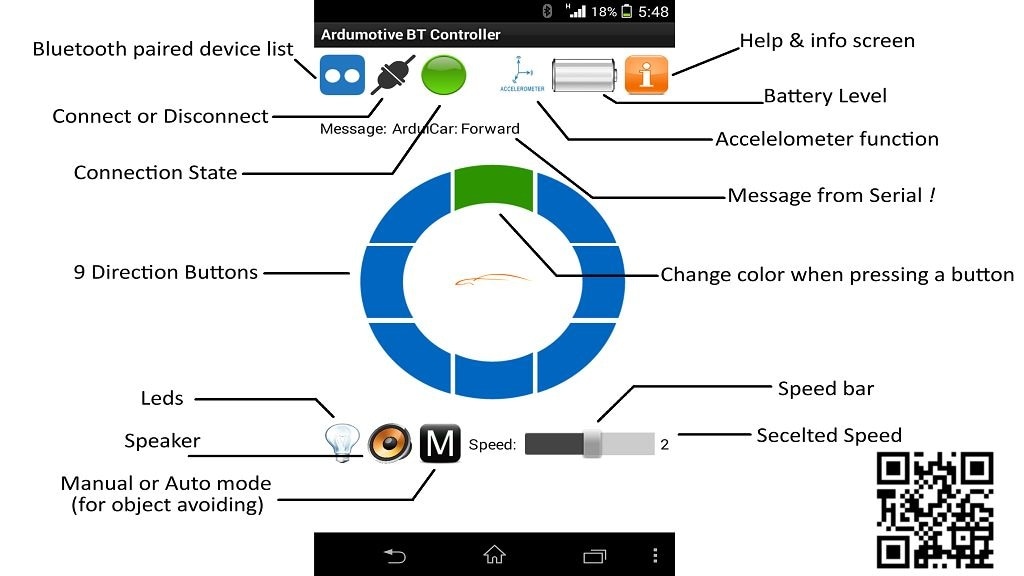
To control your new Bluetooth car, download and install this android application:
| ardumotivebt_v2.1.apk |
First enable Bluetooth and establish connection with BT module. (ex. HC-06, password 1234)
Use "Help & info" button if you can not understand how it is working.
Functions that are working with this project:
Use "Help & info" button if you can not understand how it is working.
Functions that are working with this project:
- 9 Direction buttons
- Speaker button for horn sound


