
|
Available Languages
|

|

|
Raspberry Pi 2 Model B - Introduction
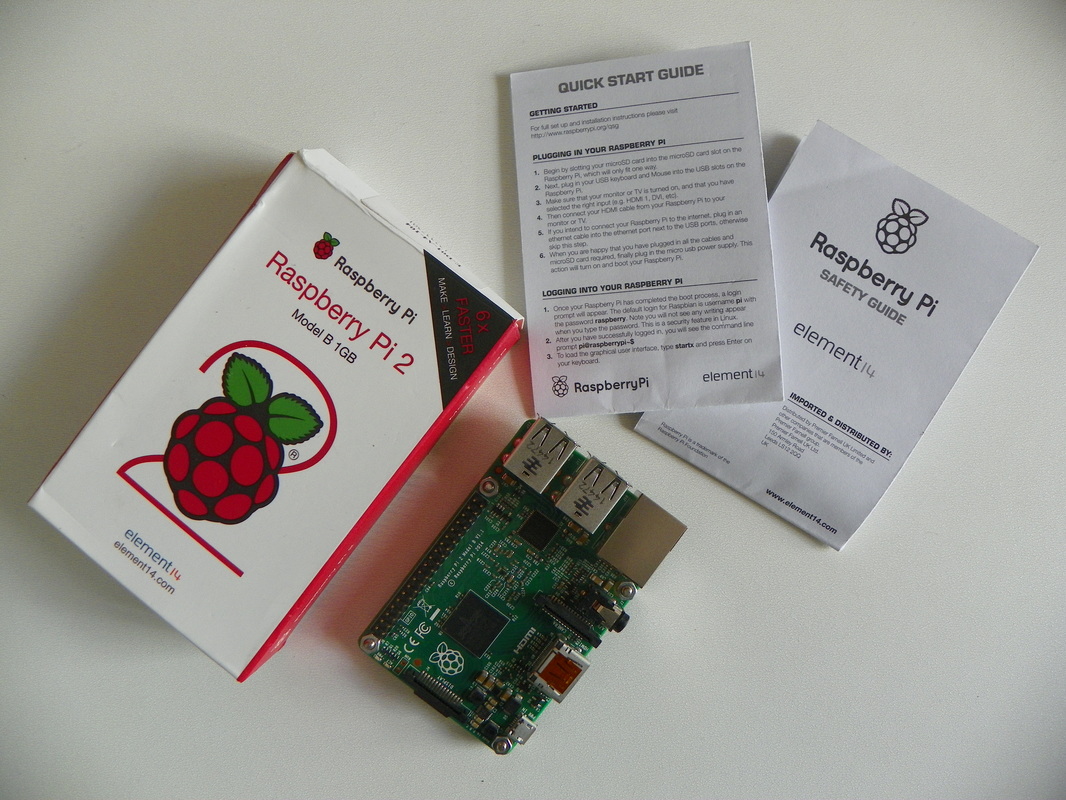
The Raspberry Pi 2 Model B is the second generation Raspberry Pi. It replaced the original Raspberry Pi 1 Model B+ in February 2015.
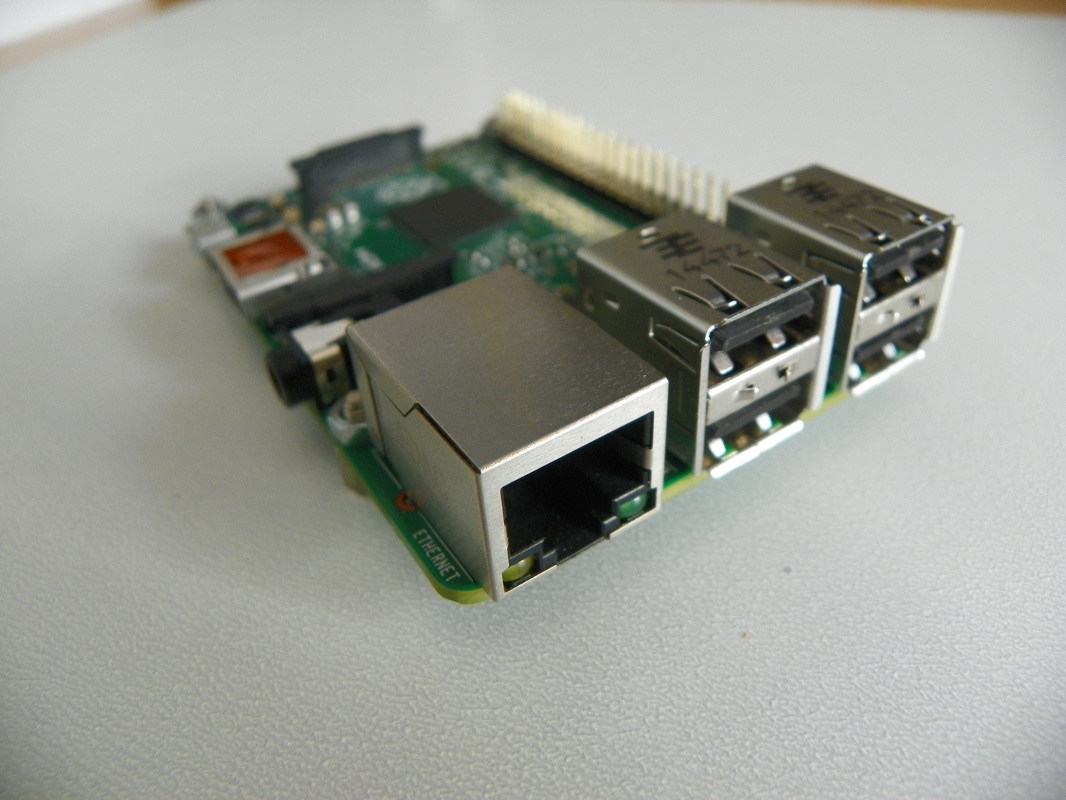
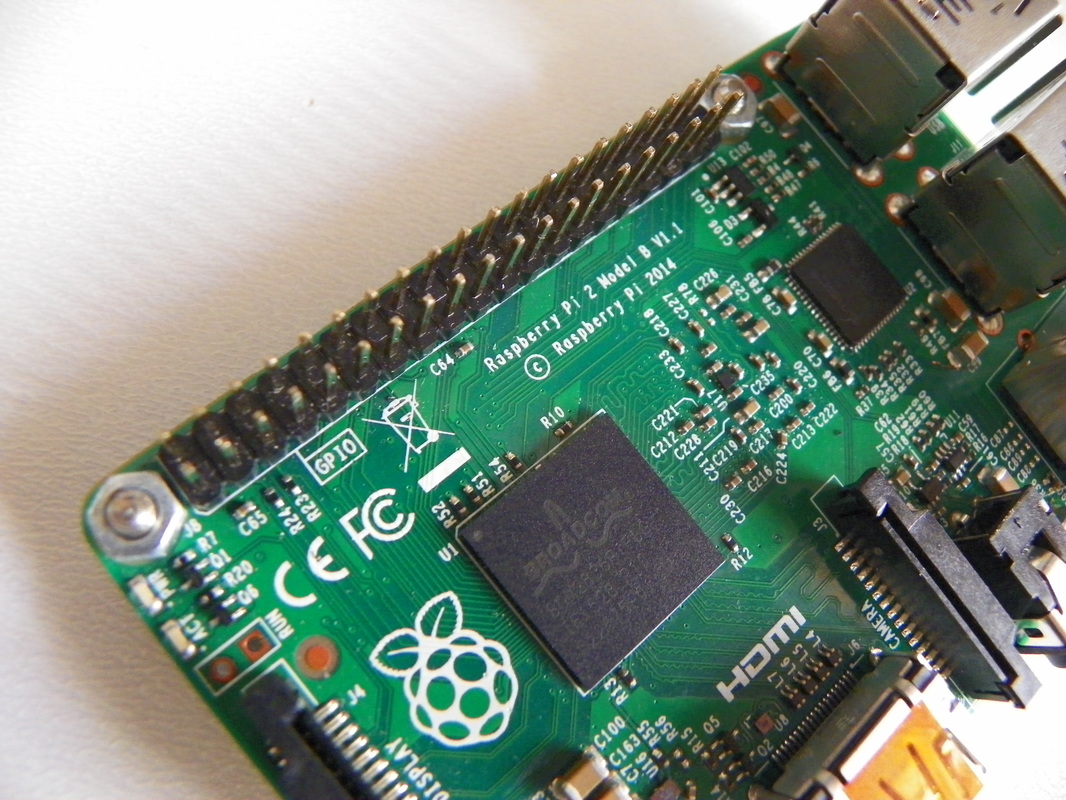
RPi2 it has:
The Raspberry Pi 2 is powered by the microUSB port so you'll need a 5V-2A power supply to go with it.
You can buy Raspberry Pi 2 from GEARBEST for only $35 - free worldwide shipping! Check it here.
RPi2 it has:
- A 900MHz quad-core ARM Cortex-A7 CPU
- 1GB RAM
- 4 USB ports
- 40 GPIO pins
- Full HDMI port
- Ethernet port
- Combined 3.5mm audio jack and composite video
- Camera interface (CSI)
- Display interface (DSI)
- Micro SD card slot
- VideoCore IV 3D graphics core
The Raspberry Pi 2 is powered by the microUSB port so you'll need a 5V-2A power supply to go with it.
You can buy Raspberry Pi 2 from GEARBEST for only $35 - free worldwide shipping! Check it here.
Let's take a look of it!

What you will need for first use
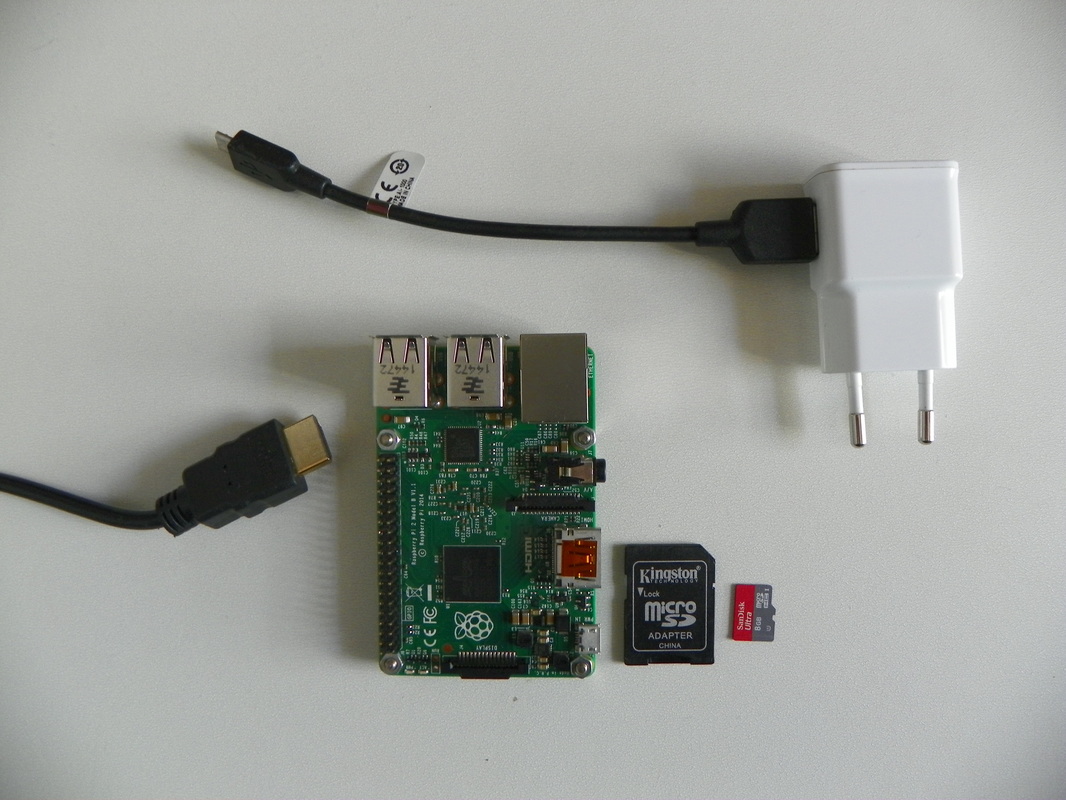
To get started with Raspberry Pi 2 Car pc you will need:
**You will need at least class 6 sd card (find more here). The Raspberry operating system is running from the micro sd card, so you will need speed on read/write operations. I am using an 8GB UHS Speed Class 1 sd card, that means 10MB/s bus mode, very fast - no lag problems.
- Raspberry Pi 2
- Power adapter 5V - 2A (micro USB)
- HDMI cable*
- 8GB micro sd card (+adapter)**
- USB mouse and keyboard
**You will need at least class 6 sd card (find more here). The Raspberry operating system is running from the micro sd card, so you will need speed on read/write operations. I am using an 8GB UHS Speed Class 1 sd card, that means 10MB/s bus mode, very fast - no lag problems.
Operating system: Rasbian

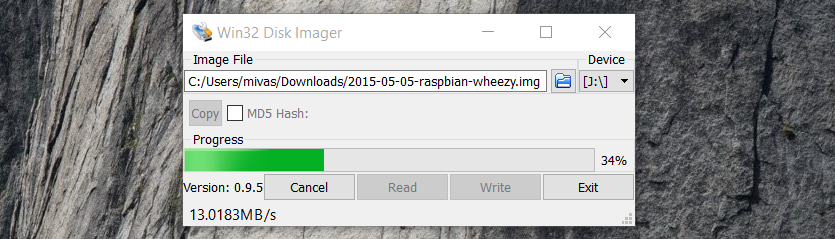
Go to official download page of Raspberry and download the final version of Rasbian Wheezy. To write the Rasbian image to your sd card you will also need the "Win32 Disk Imager" (for windows users), you can download it for free from here.
When download is completed put the 8GB micro sd card (with the adapter) in your computer (use a card reader) and open the Win32 Disk imager (right-click on the file, and select Run as administrator).
When download is completed put the 8GB micro sd card (with the adapter) in your computer (use a card reader) and open the Win32 Disk imager (right-click on the file, and select Run as administrator).
|
|
Follow the steps below.
|
*Be careful to select the correct drive! if you select a wrong one you can lose your data from it.
If you are not using Windows OS follow installation steps from here.
If you are not using Windows OS follow installation steps from here.
Setting up the Raspbian Wheezy
Put your micro sd card in the RPi2 sd card slot. Now connect the usb mouse and keyboard and the HDMI* cable to your TV/monitor**. Finally plug in the micro usb power supply to turn it on.
*If your TV/monitor doesn't have an HDMI port you can use an HDMI to VGA (+audio) cable or the video output from 3.5mm jack (in this case you will need a 3.5mm jack to RCA cable). Put the sd card again to your computer and open the "config.txt" file from boot partition. You will need to find below lines and remove the "#" symbol from them.
/boot/config.txt
You need also to change the hdmi_group and hdmi_mode according this table. For example, I am using a 14 inch monitor with resolution 1024x768 - 60Hz, so I changed those commands to hdmi_group=2 and hdmi_mode=16. Now put the sd card back to the Raspberry.
**In some cases the TV/monitor must be turned on before power up the Raspberry.
**In some cases the TV/monitor must be turned on before power up the Raspberry.
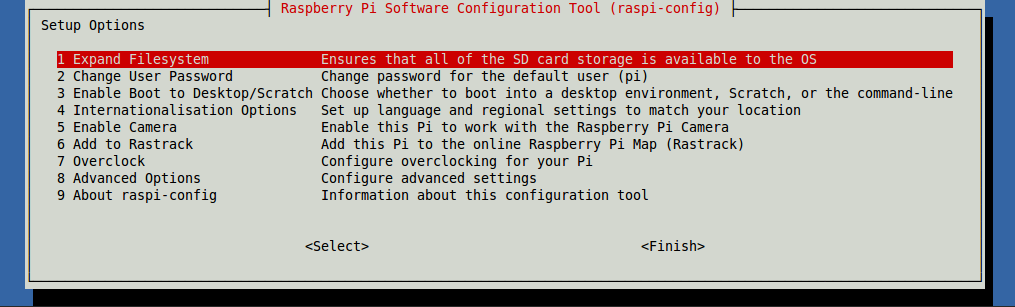
Now you will see a blue screen with some options. Make sure to complete the steps below:
By using the arrow keys and enter in your keyboard select:
By using the arrow keys and enter in your keyboard select:
- 1. Expand Filesystem
- 2. Change User Password - Set it to 'a'
- 3. Enable Boot to Deskop/Scratch - Select the first option "Console Text console"
- 4. Internationalisation Options - You can change locale, timezone or/and keyboard layout
I am living in Greece, so I selected "el_GR ISO-8859-7" (ok to the next window) and timezone Europe/Athens. - 7. Overclock* - I recommended to select Pi2 (you can also skip this step)
- 8. Andanced Options - Set overscan and serial to disable and enable SSH
- Go down and select the "Finish" button. (YES on reboot dialog)
|
|
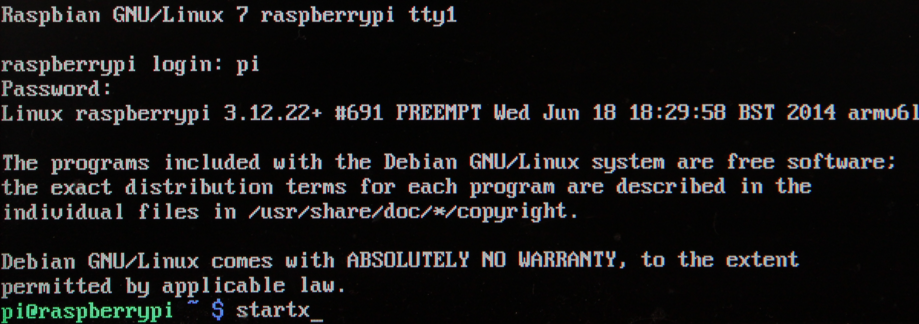
Once your Raspberry has completed the setup and booting process will appear a ternal-login promt. Type pi and press enter. Now type the password 'a' and press enter. Finally type "startx" and press enter to load the graphical user interface (GUI).
|
Well done!
You have successfully completed this tutorial and you have up and running the Raspbian OS on your Raspberry Pi2!
Proceed to next step to install the car pc main system
Proceed to next step to install the car pc main system


