
|
Available Languages
|

|

|
Introduction
|
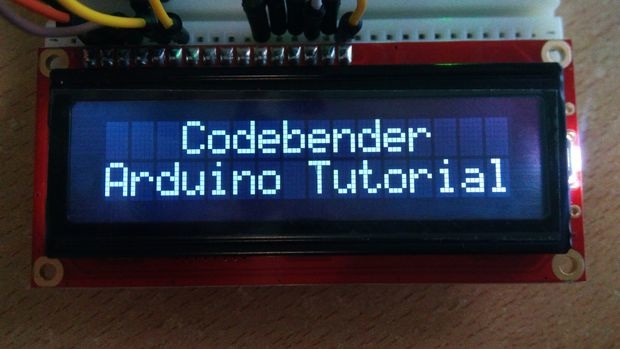
The LiquidCrystal library allows you to control LCD displays that are compatible with the Hitachi HD44780 driver. There are many of them out there, and you can usually tell them by the 16-pin interface.
In this tutorial you will learn how to use LCD 16x2 display (and 20x4, e.t.c.) with Arduino uno. You will also learn how to use lcd.begin(), lcd.print() and lcd.setCursor() functions |
What you will need - Hardware
|
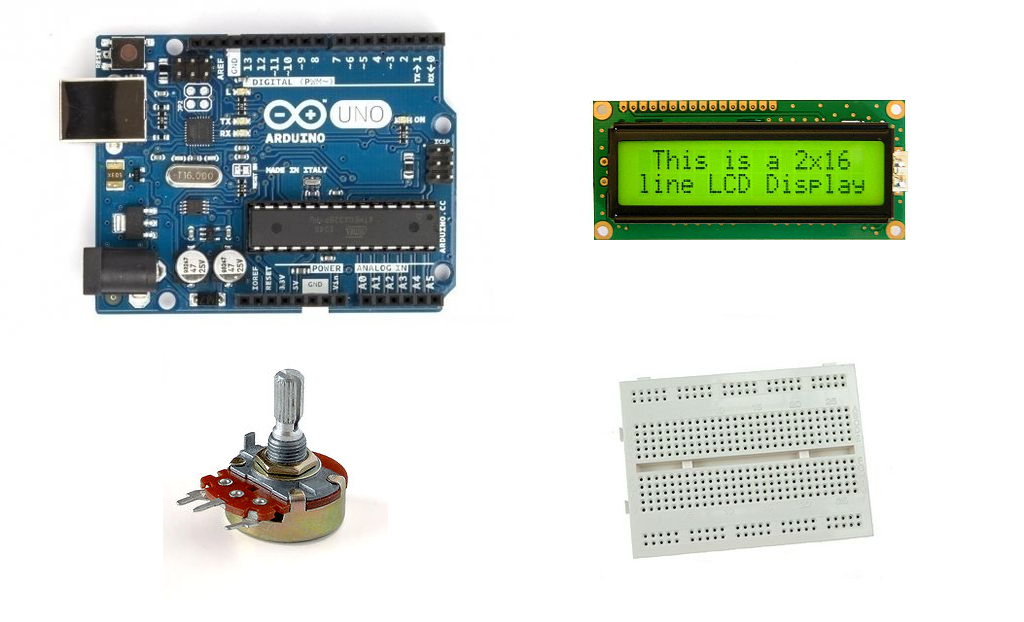
For this tutorial you will need:
|
|
About LCD dislpay pinout
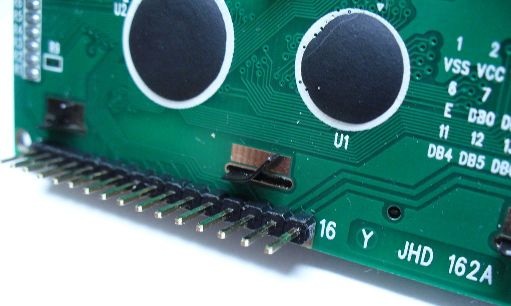
The parallel interface consists of the following pins:
For displaying text on the screen, you can do most everything in 4-bit mode, so in this tutorial we will use 4-bit mode.
- Power Supply pins (Vss/Vcc): Power the LCD
- Contrast pin (Vo): Control the display contrast
- Register Select (RS) pin: Controls where in the LCD's memory you're writing data to
- Read/Write (R/W): Selects reading mode or writing mode
- Enable pin: Enables writing to the registers
- 8 data pins (D0 -D7): The states of these pins (high or low) are the bits that you're writing to a register when you write, or the values you're reading when you read.
- Backlight (Bklt+ and BKlt-) pins: Turn on/off the LED backlight
For displaying text on the screen, you can do most everything in 4-bit mode, so in this tutorial we will use 4-bit mode.
The Circuit
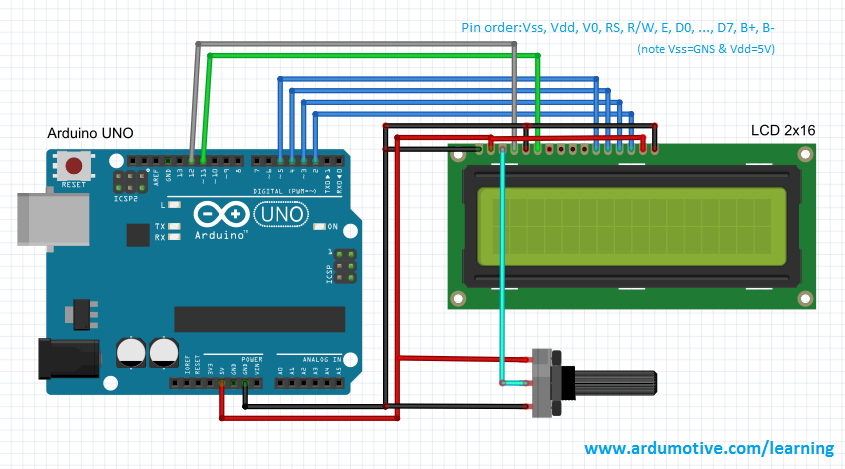
The connections are easy, see the image above with breadboard circuit schematic.
The code
The lcd.begin(16,2) command set up the LCD number of columns and rows. For example, if you have an LCD with 20 columns and 4 rows (20x4) you will have to change this to lcd.begin(20x4).
The lcd.print("--message--") command print a message to first column and row of lcd display. The "message" must have maximum length equal to lcd columns number. For example, for 16 columns display max length is equal with 16 and for 20 columns display max length is equal with 20.
The lcd.setCursor(0,1) command will set cursor to first column of second row. If you have an LCD 20x4 and you want to print a message to column five and third row you have to use: lcd.setCursor(4,2).
1 2 3 4 5 6 7 8 9 10 11 12 13 14 15 16 17 18 19 20 21 22 23 | /* Arduino Tutorial: Learn how to use an LCD 16x2 screen More info: http://www.ardumotive.com/how-to-use-an-lcd-dislpay-en.html */ //Include LCD library #include <LiquidCrystal.h> // initialize the library with the numbers of the interface pins LiquidCrystal lcd(12, 11, 5, 4, 3, 2); void setup() { // set up the LCD's number of columns and rows: lcd.begin(16, 2); // Print a message to the LCD. lcd.print("Hello World!"); } void loop() { // set the cursor to column 0, line 1 // (note: line 1 is the second row, since counting begins with 0): lcd.setCursor(0, 1); //Print a message to second line of LCD lcd.print("Ardumotive"); } |
|
Download the code from here and open it with Arduino IDE.
|
| ||
You can keep playing with that and start making your own modifications to the code. For example, try to change message on first and second row.
Well done!
You have successfully completed one more Arduino "How to" tutorial and you learned how to use an LCD display with Arduino uno.
I hope you liked this, let me know in the comments.
I hope you liked this, let me know in the comments.


