
|
Available Languages
|

|

|
Introduction
|
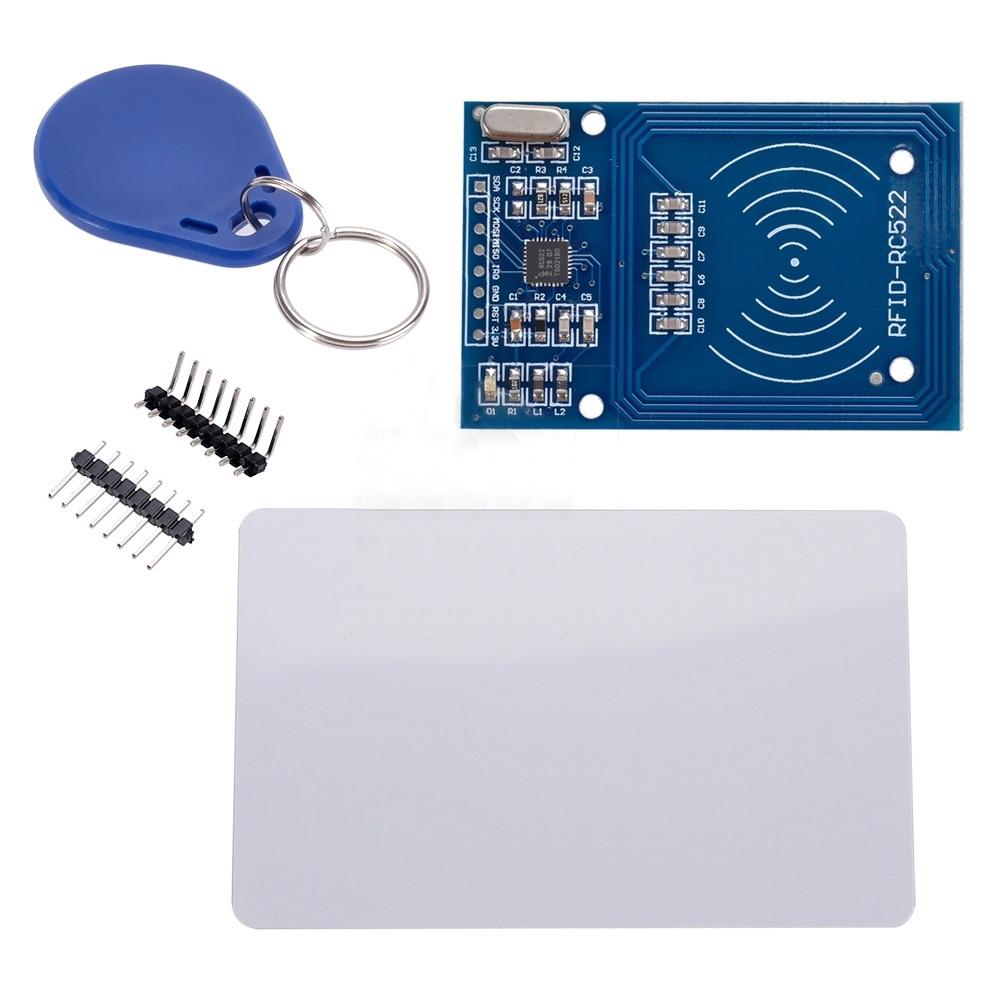
In this tutorial we will use the MFRC-522 NFC/RFID Controller.
This module can read/write to tags and cards and also "act" like a NFC tag. The RFID Reader Module can be used in a wide variety of hobbyist and commercial applications, including access control, automatic identification and payment systems . In this tutorial we will use the Arduino UNO board with this module and the serial monitor to print the ID code of the card or NFC tag. So, let’s get started! |
What you will need - Hardware
|
For this tutorial you will need:
|
|
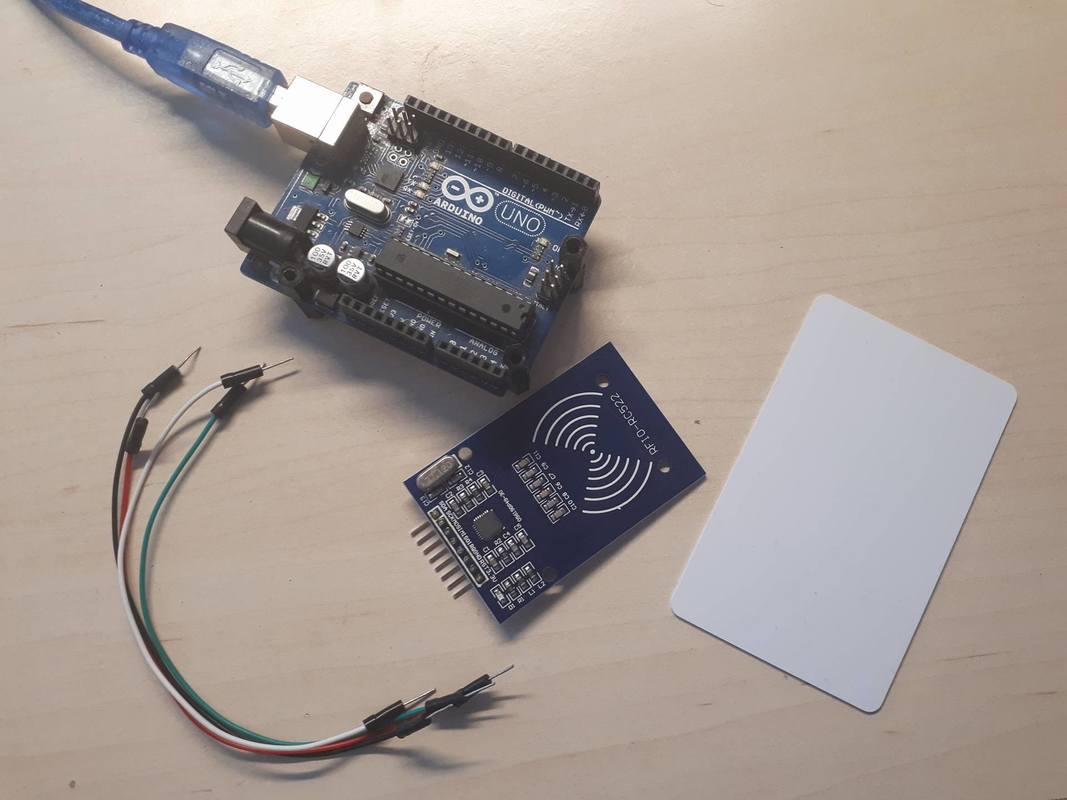
The Circuit

The connections are pretty easy, see the above image with the breadboard circuit schematic.
|
|
Connections of the MFRC-522 NFC/RFID sensor:
|
The code
1 2 3 4 5 6 7 8 9 10 11 12 13 14 15 16 17 18 19 20 21 22 23 24 25 26 27 28 29 30 31 32 33 34 35 36 37 38 39 40 41 42 43 44 45 46 47 48 49 50 51 52 53 54 55 56 57 58 59 60 61 62 63 64 65 66 67 68 69 70 71 72 73 74 75 76 77 78 79 80 81 82 83 84 85 86 87 88 89 90 91 92 93 94 95 96 97 98 99 100 101 102 103 104 105 106 107 108 109 110 111 112 113 114 115 116 117 118 119 120 121 122 123 124 125 126 127 128 129 130 131 132 133 134 135 136 | /* * ---------------------------------------------------------------------------- * This is a MFRC522 library example; see https://github.com/miguelbalboa/rfid * ---------------------------------------------------------------------------- */ #include <SPI.h> #include <MFRC522.h> constexpr uint8_t RST_PIN = 9; // Configurable, see typical pin layout above constexpr uint8_t SS_PIN = 10; // Configurable, see typical pin layout above MFRC522 mfrc522(SS_PIN, RST_PIN); // Create MFRC522 instance. // Number of known default keys (hard-coded) // NOTE: Synchronize the NR_KNOWN_KEYS define with the defaultKeys[] array constexpr uint8_t NR_KNOWN_KEYS = 8; // Known keys, see: https://code.google.com/p/mfcuk/wiki/MifareClassicDefaultKeys byte knownKeys[NR_KNOWN_KEYS][MFRC522::MF_KEY_SIZE] = { {0xff, 0xff, 0xff, 0xff, 0xff, 0xff}, // FF FF FF FF FF FF = factory default {0xa0, 0xa1, 0xa2, 0xa3, 0xa4, 0xa5}, // A0 A1 A2 A3 A4 A5 {0xb0, 0xb1, 0xb2, 0xb3, 0xb4, 0xb5}, // B0 B1 B2 B3 B4 B5 {0x4d, 0x3a, 0x99, 0xc3, 0x51, 0xdd}, // 4D 3A 99 C3 51 DD {0x1a, 0x98, 0x2c, 0x7e, 0x45, 0x9a}, // 1A 98 2C 7E 45 9A {0xd3, 0xf7, 0xd3, 0xf7, 0xd3, 0xf7}, // D3 F7 D3 F7 D3 F7 {0xaa, 0xbb, 0xcc, 0xdd, 0xee, 0xff}, // AA BB CC DD EE FF {0x00, 0x00, 0x00, 0x00, 0x00, 0x00} // 00 00 00 00 00 00 }; /* * Initialize. */ void setup() { Serial.begin(9600); // Initialize serial communications with the PC while (!Serial); // Do nothing if no serial port is opened (added for Arduinos based on ATMEGA32U4) SPI.begin(); // Init SPI bus mfrc522.PCD_Init(); // Init MFRC522 card Serial.println(F("Try the most used default keys to print block 0 of a MIFARE PICC.")); } /* * Helper routine to dump a byte array as hex values to Serial. */ void dump_byte_array(byte *buffer, byte bufferSize) { for (byte i = 0; i < bufferSize; i++) { Serial.print(buffer[i] < 0x10 ? " 0" : " "); Serial.print(buffer[i], HEX); } } /* * Try using the PICC (the tag/card) with the given key to access block 0. * On success, it will show the key details, and dump the block data on Serial. * * @return true when the given key worked, false otherwise. */ boolean try_key(MFRC522::MIFARE_Key *key) { boolean result = false; byte buffer[18]; byte block = 0; MFRC522::StatusCode status; // http://arduino.stackexchange.com/a/14316 if ( ! mfrc522.PICC_IsNewCardPresent()) return false; if ( ! mfrc522.PICC_ReadCardSerial()) return false; // Serial.println(F("Authenticating using key A...")); status = mfrc522.PCD_Authenticate(MFRC522::PICC_CMD_MF_AUTH_KEY_A, block, key, &(mfrc522.uid)); if (status != MFRC522::STATUS_OK) { // Serial.print(F("PCD_Authenticate() failed: ")); // Serial.println(mfrc522.GetStatusCodeName(status)); return false; } // Read block byte byteCount = sizeof(buffer); status = mfrc522.MIFARE_Read(block, buffer, &byteCount); if (status != MFRC522::STATUS_OK) { // Serial.print(F("MIFARE_Read() failed: ")); // Serial.println(mfrc522.GetStatusCodeName(status)); } else { // Successful read result = true; Serial.print(F("Success with key:")); dump_byte_array((*key).keyByte, MFRC522::MF_KEY_SIZE); Serial.println(); // Dump block data Serial.print(F("Block ")); Serial.print(block); Serial.print(F(":")); dump_byte_array(buffer, 16); Serial.println(); } Serial.println(); mfrc522.PICC_HaltA(); // Halt PICC mfrc522.PCD_StopCrypto1(); // Stop encryption on PCD return result; } /* * Main loop. */ void loop() { // Look for new cards if ( ! mfrc522.PICC_IsNewCardPresent()) return; // Select one of the cards if ( ! mfrc522.PICC_ReadCardSerial()) return; // Show some details of the PICC (that is: the tag/card) Serial.print(F("Card UID:")); dump_byte_array(mfrc522.uid.uidByte, mfrc522.uid.size); Serial.println(); Serial.print(F("PICC type: ")); MFRC522::PICC_Type piccType = mfrc522.PICC_GetType(mfrc522.uid.sak); Serial.println(mfrc522.PICC_GetTypeName(piccType)); // Try the known default keys MFRC522::MIFARE_Key key; for (byte k = 0; k < NR_KNOWN_KEYS; k++) { // Copy the known key into the MIFARE_Key structure for (byte i = 0; i < MFRC522::MF_KEY_SIZE; i++) { key.keyByte[i] = knownKeys[k][i]; } // Try the key if (try_key(&key)) { // Found and reported on the key and block, // no need to try other keys for this PICC break; } } } |
|
Download the code from here and open it with Arduino IDE. Inside you will also find and the library.
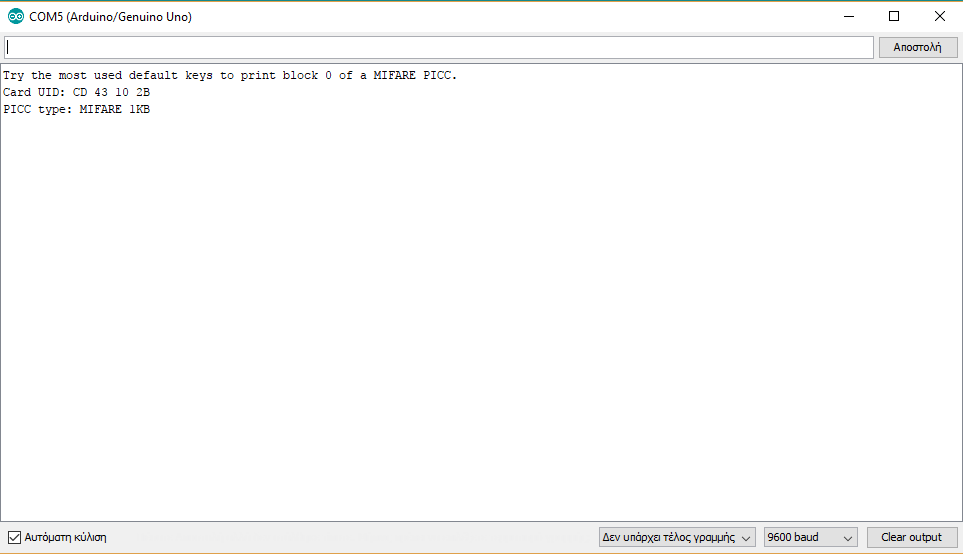
Open the serial monitor from tools menu of Arduino IDE. |
| ||
Serial Monitor
Put the card or NFC tag in front of the RFID module.
Well done!
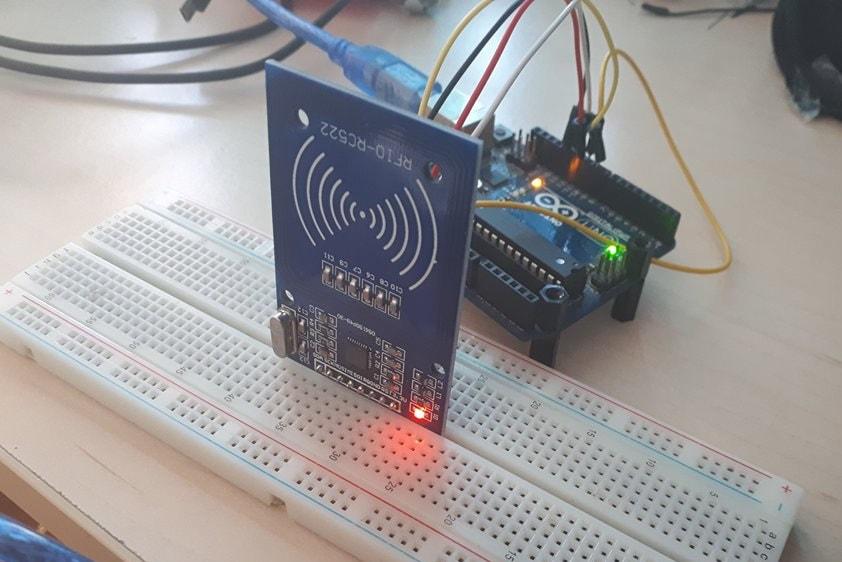
You have successfully completed one more “How to” tutorial and you learned how to use the MFRC-522 NFC/RFID Controller with Arduino uno board.
I hope you liked this, let me know in the comments!
I hope you liked this, let me know in the comments!


